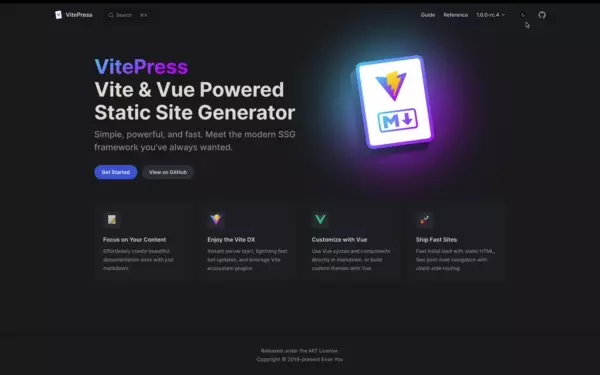
기본 테마 확장하기
VitePress의 기본 테마는 문서화에 최적화되어 있으며, 커스텀할 수 있습니다. 포괄적인 옵션 목록은 기본 테마 구성을 참고하세요.
그러나 구성만으로는 충분하지 않을 수 있습니다. 예를 들어:
- CSS 스타일링을 조정해야 하는 경우.
- 전역 컴포넌트를 등록하기 위해 Vue 애플리케이션 인스턴스를 수정해야 하는 경우.
- 레이아웃 슬롯을 통해 테마에 커스텀 컨텐츠를 삽입해야 하는 경우.
이러한 고급 커스터마이징은 기본 테마를 "확장"하는 커스텀 테마 사용이 필요 합니다.
TIP
진행하기 전에, 커스텀 테마가 어떻게 작동하는지 이해하려면 먼저 커스텀 테마 사용하기를 읽어보세요.
CSS 커스터마이징하기
기본 테마의 CSS는 루트 레벨의 CSS 변수를 재정의하여 커스터마이징 할 수 있습니다:
import DefaultTheme from 'vitepress/theme'
import './custom.css'

export default DefaultTheme/* .vitepress/theme/custom.css */
:root {
--vp-c-brand-1: #646cff;
--vp-c-brand-2: #747bff;
}재정의할 수 있는 기본 테마 CSS 변수는 여기를 참고하세요.
다른 폰트 사용하기
VitePress는 기본 폰트로 Inter를 사용하며, 빌드 결과물에 폰트를 포함시킵니다. 폰트는 프로덕션 환경에서 자동으로 미리 로드되지만, 다른 메인 폰트를 사용하고자 할 경우 이는 바람직하지 않을 수 있습니다.
빌드 결과물에 Inter를 포함시키지 않으려면, vitepress/theme-without-fonts에서 테마를 "import" 합니다:
import DefaultTheme from 'vitepress/theme-without-fonts'
import './my-fonts.css'

export default DefaultTheme/* .vitepress/theme/my-fonts.css */
:root {
--vp-font-family-base: /* 일반 텍스트 폰트 */
--vp-font-family-mono: /* 코드 폰트 */
}WARNING
선택적 컴포넌트인 팀 페이지 등을 사용하는 경우, 반드시 이들도 vitepress/theme-without-fonts에서 "import" 해야 합니다!
폰트가 @font-face를 통해 참조된 로컬 파일인 경우, 에셋으로 처리되어 해시된 파일 이름으로 .vitepress/dist/assets에 포함됩니다. 이 파일을 미리 로드하려면 transformHead 빌드 훅을 사용해야 합니다:
export default {
  transformHead({ assets }) {
    // 폰트를 매칭하기 위해 정규식을 적절히 조정하세요
    const myFontFile = assets.find(file => /font-name\.[\w-]+\.woff2/.test(file))
    if (myFontFile) {
      return [
        [
          'link',
          {
            rel: 'preload',
            href: myFontFile,
            as: 'font',
            type: 'font/woff2',
            crossorigin: ''
          }
        ]
      ]
    }
  }
}
전역 컴포넌트 등록하기
import DefaultTheme from 'vitepress/theme'

/** @type {import('vitepress').Theme} */
export default {
  extends: DefaultTheme,
  enhanceApp({ app }) {
    // 커스텀 전역 컴포넌트 등록
    app.component('MyGlobalComponent' /* ... */)
  }
}
TypeScript를 사용하는 경우:
import type { Theme } from 'vitepress'
import DefaultTheme from 'vitepress/theme'

export default {
  extends: DefaultTheme,
  enhanceApp({ app }) {
    // 커스텀 전역 컴포넌트 등록
    app.component('MyGlobalComponent' /* ... */)
  }
} satisfies Theme
Vite를 사용하므로, Vite의 glob import 기능을 활용하여 컴포넌트 디렉터리를 자동으로 등록할 수 있습니다.
레이아웃 슬롯
기본 테마의 <Layout/> 컴포넌트는 페이지의 특정 위치에 컨텐츠를 삽입할 수 있는 몇 가지 슬롯을 가지고 있습니다. 다음은 아웃라인 앞에 컴포넌트를 삽입하는 예제입니다:
import DefaultTheme from 'vitepress/theme'
import MyLayout from './MyLayout.vue'

export default {
  extends: DefaultTheme,
  // 슬롯을 삽입하는 래퍼 컴포넌트로
  // Layout을 재정의합니다
  Layout: MyLayout
}<script setup>
import DefaultTheme from 'vitepress/theme'
const { Layout } = DefaultTheme
</script>
<template>
<Layout>
<template #aside-outline-before>
My custom sidebar top content
</template>
</Layout>
</template>또는 렌더 함수를 사용할 수도 있습니다.
import { h } from 'vue'
import DefaultTheme from 'vitepress/theme'
import MyComponent from './MyComponent.vue'

export default {
  extends: DefaultTheme,
  Layout() {
    return h(DefaultTheme.Layout, null, {
      'aside-outline-before': () => h(MyComponent)
    })
  }
}
기본 테마 레이아웃에서 사용할 수 있는 슬롯의 전체 목록:
- 전문(front-matter)으로
layout: 'doc'(기본값)이 활성화된 경우:doc-topdoc-bottomdoc-footer-beforedoc-beforedoc-aftersidebar-nav-beforesidebar-nav-afteraside-topaside-bottomaside-outline-beforeaside-outline-afteraside-ads-beforeaside-ads-after
- 전문으로
layout: 'home'이 활성화된 경우:home-hero-beforehome-hero-info-beforehome-hero-infohome-hero-info-afterhome-hero-actions-afterhome-hero-imagehome-hero-afterhome-features-beforehome-features-after
- 전문으로
layout: 'page'이 활성화된 경우:page-toppage-bottom
- 페이지를 찾을 수 없음(404)일 때:
not-found
- 항상:
layout-toplayout-bottomnav-bar-title-beforenav-bar-title-afternav-bar-content-beforenav-bar-content-afternav-screen-content-beforenav-screen-content-after
뷰 트랜지션 API 사용하기
외형 토글
기본 테마를 확장하여 컬러 모드가 전환될 때 커스텀 트랜지션 효과를 제공할 수 있습니다. 예제:
<script setup lang="ts">
import { useData } from 'vitepress'
import DefaultTheme from 'vitepress/theme'
import { nextTick, provide } from 'vue'

const { isDark } = useData()

const enableTransitions = () =>
  'startViewTransition' in document &&
  window.matchMedia('(prefers-reduced-motion: no-preference)').matches

provide('toggle-appearance', async ({ clientX: x, clientY: y }: MouseEvent) => {
  if (!enableTransitions()) {
    isDark.value = !isDark.value
    return
  }

  const clipPath = [
    `circle(0px at ${x}px ${y}px)`,
    `circle(${Math.hypot(
      Math.max(x, innerWidth - x),
      Math.max(y, innerHeight - y)
    )}px at ${x}px ${y}px)`
  ]

  await document.startViewTransition(async () => {
    isDark.value = !isDark.value
    await nextTick()
  }).ready

  document.documentElement.animate(
    { clipPath: isDark.value ? clipPath.reverse() : clipPath },
    {
      duration: 300,
      easing: 'ease-in',
      fill: 'forwards',
      pseudoElement: `::view-transition-${isDark.value ? 'old' : 'new'}(root)`
    }
  )
})
</script>

<template>
  <DefaultTheme.Layout />
</template>

<style>
::view-transition-old(root),
::view-transition-new(root) {
  animation: none;
  mix-blend-mode: normal;
}

::view-transition-old(root),
.dark::view-transition-new(root) {
  z-index: 1;
}

::view-transition-new(root),
.dark::view-transition-old(root) {
  z-index: 9999;
}

.VPSwitchAppearance {
  width: 22px !important;
}

.VPSwitchAppearance .check {
  transform: none !important;
}
</style>
결과 (광과민성 주의!: 색상 깜빡임, 갑작스러운 움직임, 밝은 빛):
데모

뷰 트랜지션에 대한 자세한 정보는 크롬 문서를 참고하세요.
라우트 변경 시
곧 제공될 예정입니다.
내부 컴포넌트 재정의하기
Vite의 별칭을 사용하여 기본 테마 컴포넌트를 커스텀 컴포넌트로 대체할 수 있습니다:
import { fileURLToPath, URL } from 'node:url'
import { defineConfig } from 'vitepress'

export default defineConfig({
  vite: {
    resolve: {
      alias: [
        {
          find: /^.*\/VPNavBar\.vue$/,
          replacement: fileURLToPath(
            new URL('./components/CustomNavBar.vue', import.meta.url)
          )
        }
      ]
    }
  }
})
컴포넌트의 정확한 이름을 알고 싶다면 Vitepress 소스 코드를 참고하세요. 컴포넌트는 내부적으로 사용되기 때문에, 마이너 릴리즈 사이에 이름이 변경될 가능성이 있습니다.