{{ data }}
```
Output:
```json
{
"hello": "world"
}
```
You'll notice the data loader itself does not export the `data`. It is VitePress calling the `load()` method behind the scenes and implicitly exposing the result via the `data` named export.
This works even if the loader is async:
```js
export default {
async load() {
// fetch remote data
return (await fetch('...')).json()
}
}
```
## Data from Local Files
When you need to generate data based on local files, you should use the `watch` option in the data loader so that changes made to these files can trigger hot updates.
The `watch` option is also convenient in that you can use [glob patterns](https://github.com/mrmlnc/fast-glob#pattern-syntax) to match multiple files. The patterns can be relative to the loader file itself, and the `load()` function will receive the matched files as absolute paths.
The following example shows loading CSV files and transforming them into JSON using [csv-parse](https://github.com/adaltas/node-csv/tree/master/packages/csv-parse/). Because this file only executes at build time, you will not be shipping the CSV parser to the client!
```js
import fs from 'node:fs'
import { parse } from 'csv-parse/sync'
export default {
watch: ['./data/*.csv'],
load(watchedFiles) {
// watchedFiles will be an array of absolute paths of the matched files.
// generate an array of blog post metadata that can be used to render
// a list in the theme layout
return watchedFiles.map((file) => {
return parse(fs.readFileSync(file, 'utf-8'), {
columns: true,
skip_empty_lines: true
})
})
}
}
```
## `createContentLoader`
When building a content focused site, we often need to create an "archive" or "index" page: a page where we list all available entries in our content collection, for example blog posts or API pages. We **can** implement this directly with the data loader API, but since this is such a common use case, VitePress also provides a `createContentLoader` helper to simplify this:
```js [posts.data.js]
import { createContentLoader } from 'vitepress'
export default createContentLoader('posts/*.md', /* options */)
```
The helper takes a glob pattern relative to the [source directory](./routing#source-directory), and returns a `{ watch, load }` data loader object that can be used as the default export in a data loader file. It also implements caching based on file modified timestamps to improve dev performance.
Note the loader only works with Markdown files - matched non-Markdown files will be skipped.
The loaded data will be an array with the type of `ContentData[]`:
```ts
interface ContentData {
// mapped URL for the page. e.g. /posts/hello.html (does not include base)
// manually iterate or use custom `transform` to normalize the paths
url: string
// frontmatter data of the page
frontmatter: RecordAll Blog Posts
- {{ post.frontmatter.title }} by {{ post.frontmatter.author }}
` to `` will be displayed.
*
* @default 2
*/
level?: number | [number, number] | 'deep'
/**
* The title to be displayed on the outline.
*
* @default 'On this page'
*/
label?: string
}
```
## socialLinks
* Type: `SocialLink[]`
You may define this option to show your social account links with icons in nav.
```ts
export default {
themeConfig: {
socialLinks: [
// You can add any icon from simple-icons (https://simpleicons.org/):
{ icon: 'github', link: 'https://github.com/vuejs/vitepress' },
{ icon: 'twitter', link: '...' },
// You can also add custom icons by passing SVG as string:
{
icon: {
svg: ''
},
link: '...',
// You can include a custom label for accessibility too (optional but recommended):
ariaLabel: 'cool link'
}
]
}
}
```
```ts
interface SocialLink {
icon: string | { svg: string }
link: string
ariaLabel?: string
}
```
## footer
* Type: `Footer`
* Can be overridden per page via [frontmatter](./frontmatter-config#footer)
Footer configuration. You can add a message or copyright text on the footer, however, it will only be displayed when the page doesn't contain a sidebar. This is due to design concerns.
```ts
export default {
themeConfig: {
footer: {
message: 'Released under the MIT License.',
copyright: 'Copyright © 2019-present Evan You'
}
}
}
```
```ts
export interface Footer {
message?: string
copyright?: string
}
```
## editLink
* Type: `EditLink`
* Can be overridden per page via [frontmatter](./frontmatter-config#editlink)
Edit Link lets you display a link to edit the page on Git management services such as GitHub, or GitLab. See [Default Theme: Edit Link](./default-theme-edit-link) for more details.
```ts
export default {
themeConfig: {
editLink: {
pattern: 'https://github.com/vuejs/vitepress/edit/main/docs/:path',
text: 'Edit this page on GitHub'
}
}
}
```
```ts
export interface EditLink {
pattern: string
text?: string
}
```
## lastUpdated
* Type: `LastUpdatedOptions`
Allows customization for the last updated text and date format.
```ts
export default {
themeConfig: {
lastUpdated: {
text: 'Updated at',
formatOptions: {
dateStyle: 'full',
timeStyle: 'medium'
}
}
}
}
```
```ts
export interface LastUpdatedOptions {
/**
* @default 'Last updated'
*/
text?: string
/**
* @default
* { dateStyle: 'short', timeStyle: 'short' }
*/
formatOptions?: Intl.DateTimeFormatOptions & { forceLocale?: boolean }
}
```
## algolia
* Type: `AlgoliaSearch`
An option to support searching your docs site using [Algolia DocSearch](https://docsearch.algolia.com/docs/what-is-docsearch). Learn more in [Default Theme: Search](./default-theme-search)
```ts
export interface AlgoliaSearchOptions extends DocSearchProps {
locales?: Record>
}
```
View full options [here](https://github.com/vuejs/vitepress/blob/main/types/docsearch.d.ts).
## carbonAds {#carbon-ads}
* Type: `CarbonAdsOptions`
An option to display [Carbon Ads](https://www.carbonads.net/).
```ts
export default {
themeConfig: {
carbonAds: {
code: 'your-carbon-code',
placement: 'your-carbon-placement'
}
}
}
```
```ts
export interface CarbonAdsOptions {
code: string
placement: string
}
```
Learn more in [Default Theme: Carbon Ads](./default-theme-carbon-ads)
## docFooter
* Type: `DocFooter`
Can be used to customize text appearing above previous and next links. Helpful if not writing docs in English. Also can be used to disable prev/next links globally. If you want to selectively enable/disable prev/next links, you can use [frontmatter](./default-theme-prev-next-links).
```ts
export default {
themeConfig: {
docFooter: {
prev: 'Pagina prior',
next: 'Proxima pagina'
}
}
}
```
```ts
export interface DocFooter {
prev?: string | false
next?: string | false
}
```
## darkModeSwitchLabel
* Type: `string`
* Default: `Appearance`
Can be used to customize the dark mode switch label. This label is only displayed in the mobile view.
## lightModeSwitchTitle
* Type: `string`
* Default: `Switch to light theme`
Can be used to customize the light mode switch title that appears on hovering.
## darkModeSwitchTitle
* Type: `string`
* Default: `Switch to dark theme`
Can be used to customize the dark mode switch title that appears on hovering.
## sidebarMenuLabel
* Type: `string`
* Default: `Menu`
Can be used to customize the sidebar menu label. This label is only displayed in the mobile view.
## returnToTopLabel
* Type: `string`
* Default: `Return to top`
Can be used to customize the label of the return to top button. This label is only displayed in the mobile view.
## langMenuLabel
* Type: `string`
* Default: `Change language`
Can be used to customize the aria-label of the language toggle button in navbar. This is only used if you're using [i18n](../guide/i18n).
## skipToContentLabel
* Type: `string`
* Default: `Skip to content`
Can be used to customize the label of the skip to content link. This link is shown when the user is navigating the site using a keyboard.
## externalLinkIcon
* Type: `boolean`
* Default: `false`
Whether to show an external link icon next to external links in markdown.
## `useLayout`
Returns layout-related data. The returned object has the following type:
```ts
interface {
isHome: ComputedRef
sidebar: Readonly>
sidebarGroups: ComputedRef
hasSidebar: ComputedRef
isSidebarEnabled: ComputedRef
hasAside: ComputedRef
leftAside: ComputedRef
headers: Readonly>
hasLocalNav: ComputedRef
}
```
**Example:**
```vue
Only show when sidebar exists
```
---
---
url: /guide/deploy.md
---
# Deploy Your VitePress Site
The following guides are based on some shared assumptions:
* The VitePress site is inside the `docs` directory of your project.
* You are using the default build output directory (`.vitepress/dist`).
* VitePress is installed as a local dependency in your project, and you have set up the following scripts in your `package.json`:
```json [package.json]
{
"scripts": {
"docs:build": "vitepress build docs",
"docs:preview": "vitepress preview docs"
}
}
```
## Build and Test Locally
1. Run this command to build the docs:
```sh
$ npm run docs:build
```
2. Once built, preview it locally by running:
```sh
$ npm run docs:preview
```
The `preview` command will boot up a local static web server that will serve the output directory `.vitepress/dist` at `http://localhost:4173`. You can use this to make sure everything looks good before pushing to production.
3. You can configure the port of the server by passing `--port` as an argument.
```json
{
"scripts": {
"docs:preview": "vitepress preview docs --port 8080"
}
}
```
Now the `docs:preview` method will launch the server at `http://localhost:8080`.
## Setting a Public Base Path
By default, we assume the site is going to be deployed at the root path of a domain (`/`). If your site is going to be served at a sub-path, e.g. `https://mywebsite.com/blog/`, then you need to set the [`base`](../reference/site-config#base) option to `'/blog/'` in the VitePress config.
**Example:** If you're using Github (or GitLab) Pages and deploying to `user.github.io/repo/`, then set your `base` to `/repo/`.
## HTTP Cache Headers
If you have control over the HTTP headers on your production server, you can configure `cache-control` headers to achieve better performance on repeated visits.
The production build uses hashed file names for static assets (JavaScript, CSS and other imported assets not in `public`). If you inspect the production preview using your browser devtools' network tab, you will see files like `app.4f283b18.js`.
This `4f283b18` hash is generated from the content of this file. The same hashed URL is guaranteed to serve the same file content - if the contents change, the URLs change too. This means you can safely use the strongest cache headers for these files. All such files will be placed under `assets/` in the output directory, so you can configure the following header for them:
```
Cache-Control: max-age=31536000,immutable
```
::: details Example Netlify `_headers` file
```
/assets/*
cache-control: max-age=31536000
cache-control: immutable
```
Note: the `_headers` file should be placed in the [public directory](./asset-handling#the-public-directory) - in our case, `docs/public/_headers` - so that it is copied verbatim to the output directory.
[Netlify custom headers documentation](https://docs.netlify.com/routing/headers/)
:::
::: details Example Vercel config in `vercel.json`
```json
{
"headers": [
{
"source": "/assets/(.*)",
"headers": [
{
"key": "Cache-Control",
"value": "max-age=31536000, immutable"
}
]
}
]
}
```
Note: the `vercel.json` file should be placed at the root of your **repository**.
[Vercel documentation on headers config](https://vercel.com/docs/concepts/projects/project-configuration#headers)
:::
## Platform Guides
### Netlify / Vercel / Cloudflare Pages / AWS Amplify / Render
Set up a new project and change these settings using your dashboard:
* **Build Command:** `npm run docs:build`
* **Output Directory:** `docs/.vitepress/dist`
* **Node Version:** `20` (or above)
::: warning
Don't enable options like *Auto Minify* for HTML code. It will remove comments from output which have meaning to Vue. You may see hydration mismatch errors if they get removed.
:::
### GitHub Pages
1. Create a file named `deploy.yml` inside `.github/workflows` directory of your project with some content like this:
```yaml [.github/workflows/deploy.yml]
# Sample workflow for building and deploying a VitePress site to GitHub Pages
#
name: Deploy VitePress site to Pages
on:
# Runs on pushes targeting the `main` branch. Change this to `master` if you're
# using the `master` branch as the default branch.
push:
branches: [main]
# Allows you to run this workflow manually from the Actions tab
workflow_dispatch:
# Sets permissions of the GITHUB_TOKEN to allow deployment to GitHub Pages
permissions:
contents: read
pages: write
id-token: write
# Allow only one concurrent deployment, skipping runs queued between the run in-progress and latest queued.
# However, do NOT cancel in-progress runs as we want to allow these production deployments to complete.
concurrency:
group: pages
cancel-in-progress: false
jobs:
# Build job
build:
runs-on: ubuntu-latest
steps:
- name: Checkout
uses: actions/checkout@v5
with:
fetch-depth: 0 # Not needed if lastUpdated is not enabled
# - uses: pnpm/action-setup@v4 # Uncomment this block if you're using pnpm
# with:
# version: 9 # Not needed if you've set "packageManager" in package.json
# - uses: oven-sh/setup-bun@v1 # Uncomment this if you're using Bun
- name: Setup Node
uses: actions/setup-node@v6
with:
node-version: 24
cache: npm # or pnpm / yarn
- name: Setup Pages
uses: actions/configure-pages@v4
- name: Install dependencies
run: npm ci # or pnpm install / yarn install / bun install
- name: Build with VitePress
run: npm run docs:build # or pnpm docs:build / yarn docs:build / bun run docs:build
- name: Upload artifact
uses: actions/upload-pages-artifact@v3
with:
path: docs/.vitepress/dist
# Deployment job
deploy:
environment:
name: github-pages
url: ${{ steps.deployment.outputs.page_url }}
needs: build
runs-on: ubuntu-latest
name: Deploy
steps:
- name: Deploy to GitHub Pages
id: deployment
uses: actions/deploy-pages@v4
```
::: warning
Make sure the `base` option in your VitePress is properly configured. See [Setting a Public Base Path](#setting-a-public-base-path) for more details.
:::
2. In your repository's settings under "Pages" menu item, select "GitHub Actions" in "Build and deployment > Source".
3. Push your changes to the `main` branch and wait for the GitHub Actions workflow to complete. You should see your site deployed to `https://.github.io/[repository]/` or `https:///` depending on your settings. Your site will automatically be deployed on every push to the `main` branch.
### GitLab Pages
1. Set `outDir` in VitePress config to `../public`. Configure `base` option to `'//'` if you want to deploy to `https://.gitlab.io//`. You don't need `base` if you're deploying to custom domain, user or group pages, or have "Use unique domain" setting enabled in GitLab.
2. Create a file named `.gitlab-ci.yml` in the root of your project with the content below. This will build and deploy your site whenever you make changes to your content:
```yaml [.gitlab-ci.yml]
image: node:18
pages:
cache:
paths:
- node_modules/
script:
# - apk add git # Uncomment this if you're using small docker images like alpine and have lastUpdated enabled
- npm install
- npm run docs:build
artifacts:
paths:
- public
only:
- main
```
### Azure Static Web Apps
1. Follow the [official documentation](https://docs.microsoft.com/en-us/azure/static-web-apps/build-configuration).
2. Set these values in your configuration file (and remove the ones you don't require, like `api_location`):
* **`app_location`**: `/`
* **`output_location`**: `docs/.vitepress/dist`
* **`app_build_command`**: `npm run docs:build`
### Firebase
1. Create `firebase.json` and `.firebaserc` at the root of your project:
`firebase.json`:
```json [firebase.json]
{
"hosting": {
"public": "docs/.vitepress/dist",
"ignore": []
}
}
```
`.firebaserc`:
```json [.firebaserc]
{
"projects": {
"default": ""
}
}
```
2. After running `npm run docs:build`, run this command to deploy:
```sh
firebase deploy
```
### Surge
1. After running `npm run docs:build`, run this command to deploy:
```sh
npx surge docs/.vitepress/dist
```
### Heroku
1. Follow documentation and guide given in [`heroku-buildpack-static`](https://elements.heroku.com/buildpacks/heroku/heroku-buildpack-static).
2. Create a file called `static.json` in the root of your project with the below content:
```json [static.json]
{
"root": "docs/.vitepress/dist"
}
```
### Edgio
Refer [Creating and Deploying a VitePress App To Edgio](https://docs.edg.io/guides/vitepress).
### Kinsta Static Site Hosting
You can deploy your VitePress website on [Kinsta](https://kinsta.com/static-site-hosting/) by following these [instructions](https://kinsta.com/docs/vitepress-static-site-example/).
### Stormkit
You can deploy your VitePress project to [Stormkit](https://www.stormkit.io) by following these [instructions](https://stormkit.io/blog/how-to-deploy-vitepress).
### CloudRay
You can deploy your VitePress project with [CloudRay](https://cloudray.io/) by following these [instructions](https://cloudray.io/articles/how-to-deploy-vitepress-site).
### Nginx
Here is a example of an Nginx server block configuration. This setup includes gzip compression for common text-based assets, rules for serving your VitePress site's static files with proper caching headers as well as handling `cleanUrls: true`.
```nginx
server {
gzip on;
gzip_types text/plain text/css application/json application/javascript text/xml application/xml application/xml+rss text/javascript;
listen 80;
server_name _;
index index.html;
location / {
# content location
root /app;
# exact matches -> reverse clean urls -> folders -> not found
try_files $uri $uri.html $uri/ =404;
# non existent pages
error_page 404 /404.html;
# a folder without index.html raises 403 in this setup
error_page 403 /404.html;
# adjust caching headers
# files in the assets folder have hashes filenames
location ~* ^/assets/ {
expires 1y;
add_header Cache-Control "public, immutable";
}
}
}
```
This configuration assumes that your built VitePress site is located in the `/app` directory on your server. Adjust the `root` directive accordingly if your site's files are located elsewhere.
::: warning Do not default to index.html
The try\_files resolution must not default to index.html like in other Vue applications. This would result in an invalid page state.
:::
Further information can be found in the [official nginx documentation](https://nginx.org/en/docs/), in these issues [#2837](https://github.com/vuejs/vitepress/discussions/2837), [#3235](https://github.com/vuejs/vitepress/issues/3235) as well as in this [blog post](https://blog.mehdi.cc/articles/vitepress-cleanurls-on-nginx-environment#readings) by Mehdi Merah.
---
---
url: /reference/default-theme-edit-link.md
---
# Edit Link
## Site-Level Config
Edit Link lets you display a link to edit the page on Git management services such as GitHub, or GitLab. To enable it, add `themeConfig.editLink` options to your config.
```js
export default {
themeConfig: {
editLink: {
pattern: 'https://github.com/vuejs/vitepress/edit/main/docs/:path'
}
}
}
```
The `pattern` option defines the URL structure for the link, and `:path` is going to be replaced with the page path.
You can also put a pure function that accepts [`PageData`](./runtime-api#usedata) as the argument and returns the URL string.
```js
export default {
themeConfig: {
editLink: {
pattern: ({ filePath }) => {
if (filePath.startsWith('packages/')) {
return `https://github.com/acme/monorepo/edit/main/${filePath}`
} else {
return `https://github.com/acme/monorepo/edit/main/docs/${filePath}`
}
}
}
}
}
```
It should not have side-effects nor access anything outside of its scope since it will be serialized and executed in the browser.
By default, this will add the link text "Edit this page" at the bottom of the doc page. You may customize this text by defining the `text` option.
```js
export default {
themeConfig: {
editLink: {
pattern: 'https://github.com/vuejs/vitepress/edit/main/docs/:path',
text: 'Edit this page on GitHub'
}
}
}
```
## Frontmatter Config
This can be disabled per-page using the `editLink` option on frontmatter:
```yaml
---
editLink: false
---
```
---
---
url: /guide/extending-default-theme.md
---
# Extending the Default Theme
VitePress' default theme is optimized for documentation, and can be customized. Consult the [Default Theme Config Overview](../reference/default-theme-config) for a comprehensive list of options.
However, there are a number of cases where configuration alone won't be enough. For example:
1. You need to tweak the CSS styling;
2. You need to modify the Vue app instance, for example to register global components;
3. You need to inject custom content into the theme via layout slots.
These advanced customizations will require using a custom theme that "extends" the default theme.
::: tip
Before proceeding, make sure to first read [Using a Custom Theme](./custom-theme) to understand how custom themes work.
:::
## Customizing CSS
The default theme CSS is customizable by overriding root level CSS variables:
```js [.vitepress/theme/index.js]
import DefaultTheme from 'vitepress/theme'
import './custom.css'
export default DefaultTheme
```
```css
/* .vitepress/theme/custom.css */
:root {
--vp-c-brand-1: #646cff;
--vp-c-brand-2: #747bff;
}
```
See [default theme CSS variables](https://github.com/vuejs/vitepress/blob/main/src/client/theme-default/styles/vars.css) that can be overridden.
## Using Different Fonts
VitePress uses [Inter](https://rsms.me/inter/) as the default font, and will include the fonts in the build output. The font is also auto preloaded in production. However, this may not be desirable if you want to use a different main font.
To avoid including Inter in the build output, import the theme from `vitepress/theme-without-fonts` instead:
```js [.vitepress/theme/index.js]
import DefaultTheme from 'vitepress/theme-without-fonts'
import './my-fonts.css'
export default DefaultTheme
```
```css
/* .vitepress/theme/my-fonts.css */
:root {
--vp-font-family-base: /* normal text font */
--vp-font-family-mono: /* code font */
}
```
::: warning
If you are using optional components like the [Team Page](../reference/default-theme-team-page) components, make sure to also import them from `vitepress/theme-without-fonts`!
:::
If your font is a local file referenced via `@font-face`, it will be processed as an asset and included under `.vitepress/dist/assets` with hashed filename. To preload this file, use the [transformHead](../reference/site-config#transformhead) build hook:
```js [.vitepress/config.js]
export default {
transformHead({ assets }) {
// adjust the regex accordingly to match your font
const myFontFile = assets.find(file => /font-name\.[\w-]+\.woff2/.test(file))
if (myFontFile) {
return [
[
'link',
{
rel: 'preload',
href: myFontFile,
as: 'font',
type: 'font/woff2',
crossorigin: ''
}
]
]
}
}
}
```
## Registering Global Components
```js [.vitepress/theme/index.js]
import DefaultTheme from 'vitepress/theme'
/** @type {import('vitepress').Theme} */
export default {
extends: DefaultTheme,
enhanceApp({ app }) {
// register your custom global components
app.component('MyGlobalComponent' /* ... */)
}
}
```
If you're using TypeScript:
```ts [.vitepress/theme/index.ts]
import type { Theme } from 'vitepress'
import DefaultTheme from 'vitepress/theme'
export default {
extends: DefaultTheme,
enhanceApp({ app }) {
// register your custom global components
app.component('MyGlobalComponent' /* ... */)
}
} satisfies Theme
```
Since we are using Vite, you can also leverage Vite's [glob import feature](https://vitejs.dev/guide/features.html#glob-import) to auto register a directory of components.
## Layout Slots
The default theme's `
My custom sidebar top content
```
Or you could use render function as well.
```js [.vitepress/theme/index.js]
import { h } from 'vue'
import DefaultTheme from 'vitepress/theme'
import MyComponent from './MyComponent.vue'
export default {
extends: DefaultTheme,
Layout() {
return h(DefaultTheme.Layout, null, {
'aside-outline-before': () => h(MyComponent)
})
}
}
```
Full list of slots available in the default theme layout:
* When `layout: 'doc'` (default) is enabled via frontmatter:
* `doc-top`
* `doc-bottom`
* `doc-footer-before`
* `doc-before`
* `doc-after`
* `sidebar-nav-before`
* `sidebar-nav-after`
* `aside-top`
* `aside-bottom`
* `aside-outline-before`
* `aside-outline-after`
* `aside-ads-before`
* `aside-ads-after`
* When `layout: 'home'` is enabled via frontmatter:
* `home-hero-before`
* `home-hero-info-before`
* `home-hero-info`
* `home-hero-info-after`
* `home-hero-actions-after`
* `home-hero-image`
* `home-hero-after`
* `home-features-before`
* `home-features-after`
* When `layout: 'page'` is enabled via frontmatter:
* `page-top`
* `page-bottom`
* On not found (404) page:
* `not-found`
* Always:
* `layout-top`
* `layout-bottom`
* `nav-bar-title-before`
* `nav-bar-title-after`
* `nav-bar-content-before`
* `nav-bar-content-after`
* `nav-screen-content-before`
* `nav-screen-content-after`
## Using View Transitions API
### On Appearance Toggle
You can extend the default theme to provide a custom transition when the color mode is toggled. An example:
```vue [.vitepress/theme/Layout.vue]
` element. If you want to add block elements, consider using [`layout-bottom`](../guide/extending-default-theme#layout-slots) slot instead.
:::
Note that footer will not be displayed when the [SideBar](./default-theme-sidebar) is visible.
## Frontmatter Config
This can be disabled per-page using the `footer` option on frontmatter:
```yaml
---
footer: false
---
```
---
---
url: /guide/frontmatter.md
---
# Frontmatter
## Usage
VitePress supports YAML frontmatter in all Markdown files, parsing them with [gray-matter](https://github.com/jonschlinkert/gray-matter). The frontmatter must be at the top of the Markdown file (before any elements including `
, or . You'll need to configure your PostCSS plugin to use `:where([dir="ltr"])` and `:where([dir="rtl"])` as prefixes to prevent CSS specificity issues.
---
---
url: /reference/default-theme-last-updated.md
---
# Last Updated
The update time of the last content will be displayed in the lower right corner of the page. To enable it, add `lastUpdated` options to your config.
::: info
VitePress displays the "last updated" time using the timestamp of the most recent Git commit for each file. To enable this, the Markdown file must be committed to Git.
Internally, VitePress runs `git log -1 --pretty="%ai"` on each file to retrieve its timestamp. If all pages show the same update time, it's likely due to shallow cloning (common in CI environments), which limits Git history.
To fix this in **GitHub Actions**, use the following in your workflow:
```yaml{4}
- name: Checkout
uses: actions/checkout@v5
with:
fetch-depth: 0
```
Other CI/CD platforms have similar settings.
If such options aren't available, you can prepend the `docs:build` command in your `package.json` with a manual fetch:
```json
"docs:build": "git fetch --unshallow && vitepress build docs"
```
:::
## Site-Level Config
```js
export default {
lastUpdated: true
}
```
## Frontmatter Config
This can be disabled per-page using the `lastUpdated` option on frontmatter:
```yaml
---
lastUpdated: false
---
```
Also refer [Default Theme: Last Updated](./default-theme-config#lastupdated) for more details. Any truthy value at theme-level will also enable the feature unless explicitly disabled at site or page level.
---
---
url: /reference/default-theme-layout.md
---
# Layout
You may choose the page layout by setting `layout` option to the page [frontmatter](./frontmatter-config). There are 3 layout options, `doc`, `page`, and `home`. If nothing is specified, then the page is treated as `doc` page.
```yaml
---
layout: doc
---
```
## Doc Layout
Option `doc` is the default layout and it styles the whole Markdown content into "documentation" look. It works by wrapping whole content within `vp-doc` css class, and applying styles to elements underneath it.
Almost all generic elements such as `p`, or `h2` get special styling. Therefore, keep in mind that if you add any custom HTML inside a Markdown content, those will get affected by those styles as well.
It also provides documentation specific features listed below. These features are only enabled in this layout.
* Edit Link
* Prev Next Link
* Outline
* [Carbon Ads](./default-theme-carbon-ads)
## Page Layout
Option `page` is treated as "blank page". The Markdown will still be parsed, and all of the [Markdown Extensions](../guide/markdown) work as same as `doc` layout, but it wouldn't get any default stylings.
The page layout will let you style everything by you without VitePress theme affecting the markup. This is useful when you want to create your own custom page.
Note that even in this layout, sidebar will still show up if the page has a matching sidebar config.
## Home Layout
Option `home` will generate templated "Homepage". In this layout, you can set extra options such as `hero` and `features` to customize the content further. Please visit [Default Theme: Home Page](./default-theme-home-page) for more details.
## No Layout
If you don't want any layout, you can pass `layout: false` through frontmatter. This option is helpful if you want a fully-customizable landing page (without any sidebar, navbar, or footer by default).
## Custom Layout
You can also use a custom layout:
```md
---
layout: foo
---
```
This will look for a component named `foo` registered in context. For example, you can register your component globally in `.vitepress/theme/index.ts`:
```ts
import DefaultTheme from 'vitepress/theme'
import Foo from './Foo.vue'
export default {
extends: DefaultTheme,
enhanceApp({ app }) {
app.component('foo', Foo)
}
}
```
---
---
url: /guide/markdown.md
---
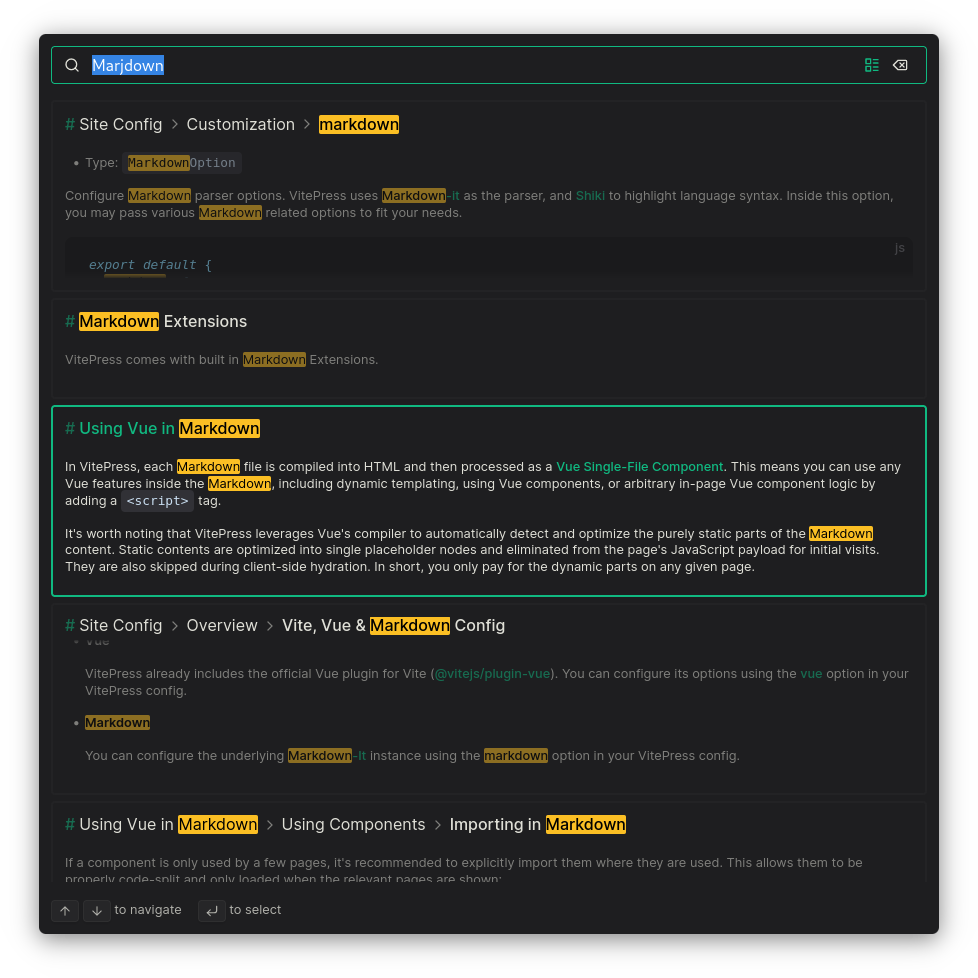
# Markdown Extensions
VitePress comes with built in Markdown Extensions.
## Header Anchors
Headers automatically get anchor links applied. Rendering of anchors can be configured using the `markdown.anchor` option.
### Custom anchors
To specify a custom anchor tag for a heading instead of using the auto-generated one, add a suffix to the heading:
```
# Using custom anchors {#my-anchor}
```
This allows you to link to the heading as `#my-anchor` instead of the default `#using-custom-anchors`.
## Links
Both internal and external links get special treatment.
### Internal Links
Internal links are converted to router links for SPA navigation. Also, every `index.md` contained in each sub-directory will automatically be converted to `index.html`, with corresponding URL `/`.
For example, given the following directory structure:
```
.
├─ index.md
├─ foo
│ ├─ index.md
│ ├─ one.md
│ └─ two.md
└─ bar
├─ index.md
├─ three.md
└─ four.md
```
And providing you are in `foo/one.md`:
```md
[Home](/)
[foo](/foo/)
[foo heading](./#heading)
[bar - three](../bar/three)
[bar - three](../bar/three.md)
[bar - four](../bar/four.html)
```
### Page Suffix
Pages and internal links get generated with the `.html` suffix by default.
### External Links
Outbound links automatically get `target="_blank" rel="noreferrer"`:
* [vuejs.org](https://vuejs.org)
* [VitePress on GitHub](https://github.com/vuejs/vitepress)
## Frontmatter
[YAML frontmatter](https://jekyllrb.com/docs/front-matter/) is supported out of the box:
```yaml
---
title: Blogging Like a Hacker
lang: en-US
---
```
This data will be available to the rest of the page, along with all custom and theming components.
For more details, see [Frontmatter](../reference/frontmatter-config).
## GitHub-Style Tables
**Input**
```md
| Tables | Are | Cool |
| ------------- | :-----------: | ----: |
| col 3 is | right-aligned | $1600 |
| col 2 is | centered | $12 |
| zebra stripes | are neat | $1 |
```
**Output**
| Tables | Are | Cool |
| ------------- | :-----------: | -----: |
| col 3 is | right-aligned | $1600 |
| col 2 is | centered | $12 |
| zebra stripes | are neat | $1 |
## Emoji :tada:
**Input**
```
:tada: :100:
```
**Output**
:tada: :100:
A [list of all emojis](https://github.com/markdown-it/markdown-it-emoji/blob/master/lib/data/full.mjs) is available.
## Table of Contents
**Input**
```
[[toc]]
```
**Output**
\[\[toc]]
Rendering of the TOC can be configured using the `markdown.toc` option.
## Custom Containers
Custom containers can be defined by their types, titles, and contents.
### Default Title
**Input**
```md
::: info
This is an info box.
:::
::: tip
This is a tip.
:::
::: warning
This is a warning.
:::
::: danger
This is a dangerous warning.
:::
::: details
This is a details block.
:::
```
**Output**
::: info
This is an info box.
:::
::: tip
This is a tip.
:::
::: warning
This is a warning.
:::
::: danger
This is a dangerous warning.
:::
::: details
This is a details block.
:::
### Custom Title
You may set custom title by appending the text right after the "type" of the container.
**Input**
````md
::: danger STOP
Danger zone, do not proceed
:::
::: details Click me to toggle the code
```js
console.log('Hello, VitePress!')
```
:::
````
**Output**
::: danger STOP
Danger zone, do not proceed
:::
::: details Click me to toggle the code
```js
console.log('Hello, VitePress!')
```
:::
Also, you may set custom titles globally by adding the following content in site config, helpful if not writing in English:
```ts
// config.ts
export default defineConfig({
// ...
markdown: {
container: {
tipLabel: '提示',
warningLabel: '警告',
dangerLabel: '危险',
infoLabel: '信息',
detailsLabel: '详细信息'
}
}
// ...
})
```
### Additional Attributes
You can add additional attributes to the custom containers. We use [markdown-it-attrs](https://github.com/arve0/markdown-it-attrs) for this feature, and it is supported on almost all markdown elements. For example, you can set the `open` attribute to make the details block open by default:
**Input**
````md
::: details Click me to toggle the code {open}
```js
console.log('Hello, VitePress!')
```
:::
````
**Output**
::: details Click me to toggle the code {open}
```js
console.log('Hello, VitePress!')
```
:::
### `raw`
This is a special container that can be used to prevent style and router conflicts with VitePress. This is especially useful when you're documenting component libraries. You might also wanna check out [whyframe](https://whyframe.dev/docs/integrations/vitepress) for better isolation.
**Syntax**
```md
::: raw
Wraps in a ``
:::
```
`vp-raw` class can be directly used on elements too. Style isolation is currently opt-in:
* Install `postcss` with your preferred package manager:
```sh
$ npm add -D postcss
```
* Create a file named `docs/postcss.config.mjs` and add this to it:
```js
import { postcssIsolateStyles } from 'vitepress'
export default {
plugins: [postcssIsolateStyles()]
}
```
You can pass its options like this:
```js
postcssIsolateStyles({
includeFiles: [/custom\.css/] // defaults to [/vp-doc\.css/, /base\.css/]
})
```
## GitHub-flavored Alerts
VitePress also supports [GitHub-flavored alerts](https://docs.github.com/en/get-started/writing-on-github/getting-started-with-writing-and-formatting-on-github/basic-writing-and-formatting-syntax#alerts) to render as callouts. They will be rendered the same as the [custom containers](#custom-containers).
```md
> [!NOTE]
> Highlights information that users should take into account, even when skimming.
> [!TIP]
> Optional information to help a user be more successful.
> [!IMPORTANT]
> Crucial information necessary for users to succeed.
> [!WARNING]
> Critical content demanding immediate user attention due to potential risks.
> [!CAUTION]
> Negative potential consequences of an action.
```
> \[!NOTE]
> Highlights information that users should take into account, even when skimming.
> \[!TIP]
> Optional information to help a user be more successful.
> \[!IMPORTANT]
> Crucial information necessary for users to succeed.
> \[!WARNING]
> Critical content demanding immediate user attention due to potential risks.
> \[!CAUTION]
> Negative potential consequences of an action.
## Syntax Highlighting in Code Blocks
VitePress uses [Shiki](https://github.com/shikijs/shiki) to highlight language syntax in Markdown code blocks, using coloured text. Shiki supports a wide variety of programming languages. All you need to do is append a valid language alias to the beginning backticks for the code block:
**Input**
````
```js
export default {
name: 'MyComponent',
// ...
}
```
````
````
```html
-
{{ todo.text }}
```
````
**Output**
```js
export default {
name: 'MyComponent'
// ...
}
```
```html
-
{{ todo.text }}
```
A [list of valid languages](https://shiki.style/languages) is available on Shiki's repository.
You may also customize syntax highlight theme, configure language aliases, and set custom language labels in app config. Please see [`markdown` options](../reference/site-config#markdown) for more details.
## Line Highlighting in Code Blocks
**Input**
````
```js{4}
export default {
data () {
return {
msg: 'Highlighted!'
}
}
}
```
````
**Output**
```js{4}
export default {
data () {
return {
msg: 'Highlighted!'
}
}
}
```
In addition to a single line, you can also specify multiple single lines, ranges, or both:
* Line ranges: for example `{5-8}`, `{3-10}`, `{10-17}`
* Multiple single lines: for example `{4,7,9}`
* Line ranges and single lines: for example `{4,7-13,16,23-27,40}`
**Input**
````
```js{1,4,6-8}
export default { // Highlighted
data () {
return {
msg: `Highlighted!
This line isn't highlighted,
but this and the next 2 are.`,
motd: 'VitePress is awesome',
lorem: 'ipsum'
}
}
}
```
````
**Output**
```js{1,4,6-8}
export default { // Highlighted
data () {
return {
msg: `Highlighted!
This line isn't highlighted,
but this and the next 2 are.`,
motd: 'VitePress is awesome',
lorem: 'ipsum',
}
}
}
```
Alternatively, it's possible to highlight directly in the line by using the `// [!code highlight]` comment.
**Input**
````
```js
export default {
data () {
return {
msg: 'Highlighted!' // [!!code highlight]
}
}
}
```
````
**Output**
```js
export default {
data() {
return {
msg: 'Highlighted!' // [!code highlight]
}
}
}
```
## Focus in Code Blocks
Adding the `// [!code focus]` comment on a line will focus it and blur the other parts of the code.
Additionally, you can define a number of lines to focus using `// [!code focus:]`.
**Input**
````
```js
export default {
data () {
return {
msg: 'Focused!' // [!!code focus]
}
}
}
```
````
**Output**
```js
export default {
data() {
return {
msg: 'Focused!' // [!code focus]
}
}
}
```
## Colored Diffs in Code Blocks
Adding the `// [!code --]` or `// [!code ++]` comments on a line will create a diff of that line, while keeping the colors of the codeblock.
**Input**
````
```js
export default {
data () {
return {
msg: 'Removed' // [!!code --]
msg: 'Added' // [!!code ++]
}
}
}
```
````
**Output**
```js
export default {
data () {
return {
msg: 'Removed' // [!code --]
msg: 'Added' // [!code ++]
}
}
}
```
## Errors and Warnings in Code Blocks
Adding the `// [!code warning]` or `// [!code error]` comments on a line will color it accordingly.
**Input**
````
```js
export default {
data () {
return {
msg: 'Error', // [!!code error]
msg: 'Warning' // [!!code warning]
}
}
}
```
````
**Output**
```js
export default {
data() {
return {
msg: 'Error', // [!code error]
msg: 'Warning' // [!code warning]
}
}
}
```
## Line Numbers
You can enable line numbers for each code blocks via config:
```js
export default {
markdown: {
lineNumbers: true
}
}
```
Please see [`markdown` options](../reference/site-config#markdown) for more details.
You can add `:line-numbers` / `:no-line-numbers` mark in your fenced code blocks to override the value set in config.
You can also customize the starting line number by adding `=` after `:line-numbers`. For example, `:line-numbers=2` means the line numbers in code blocks will start from `2`.
**Input**
````md
```ts {1}
// line-numbers is disabled by default
const line2 = 'This is line 2'
const line3 = 'This is line 3'
```
```ts:line-numbers {1}
// line-numbers is enabled
const line2 = 'This is line 2'
const line3 = 'This is line 3'
```
```ts:line-numbers=2 {1}
// line-numbers is enabled and start from 2
const line3 = 'This is line 3'
const line4 = 'This is line 4'
```
````
**Output**
```ts {1}
// line-numbers is disabled by default
const line2 = 'This is line 2'
const line3 = 'This is line 3'
```
```ts:line-numbers {1}
// line-numbers is enabled
const line2 = 'This is line 2'
const line3 = 'This is line 3'
```
```ts:line-numbers=2 {1}
// line-numbers is enabled and start from 2
const line3 = 'This is line 3'
const line4 = 'This is line 4'
```
## Import Code Snippets
You can import code snippets from existing files via following syntax:
```md
<<< @/filepath
```
It also supports [line highlighting](#line-highlighting-in-code-blocks):
```md
<<< @/filepath{highlightLines}
```
**Input**
```md
<<< @/snippets/snippet.js{2}
```
**Code file**
<<< @/snippets/snippet.js
**Output**
<<< @/snippets/snippet.js{2}
::: tip
The value of `@` corresponds to the source root. By default it's the VitePress project root, unless `srcDir` is configured. Alternatively, you can also import from relative paths:
```md
<<< ../snippets/snippet.js
```
:::
You can also use a [VS Code region](https://code.visualstudio.com/docs/editor/codebasics#_folding) to only include the corresponding part of the code file. You can provide a custom region name after a `#` following the filepath:
**Input**
```md
<<< @/snippets/snippet-with-region.js#snippet{1}
```
**Code file**
<<< @/snippets/snippet-with-region.js
**Output**
<<< @/snippets/snippet-with-region.js#snippet{1}
You can also specify the language inside the braces (`{}`) like this:
```md
<<< @/snippets/snippet.cs{c#}
<<< @/snippets/snippet.cs{1,2,4-6 c#}
<<< @/snippets/snippet.cs{1,2,4-6 c#:line-numbers}
```
This is helpful if source language cannot be inferred from your file extension.
## Code Groups
You can group multiple code blocks like this:
**Input**
````md
::: code-group
```js [config.js]
/**
* @type {import('vitepress').UserConfig}
*/
const config = {
// ...
}
export default config
```
```ts [config.ts]
import type { UserConfig } from 'vitepress'
const config: UserConfig = {
// ...
}
export default config
```
:::
````
**Output**
::: code-group
```js [config.js]
/**
* @type {import('vitepress').UserConfig}
*/
const config = {
// ...
}
export default config
```
```ts [config.ts]
import type { UserConfig } from 'vitepress'
const config: UserConfig = {
// ...
}
export default config
```
:::
You can also [import snippets](#import-code-snippets) in code groups:
**Input**
```md
::: code-group
<<< @/snippets/snippet.js
<<< @/snippets/snippet-with-region.js#snippet{1,2 ts:line-numbers} [snippet with region]
:::
```
**Output**
::: code-group
<<< @/snippets/snippet.js
<<< @/snippets/snippet-with-region.js#snippet{1,2 ts:line-numbers} \[snippet with region]
:::
## Markdown File Inclusion
You can include a markdown file in another markdown file, even nested.
::: tip
You can also prefix the markdown path with `@`, and it will act as the source root. By default, the source root is the VitePress project root, unless `srcDir` is configured.
:::
For example, you can include a relative markdown file using this:
**Input**
```md
# Docs
## Basics
```
**Part file** (`parts/basics.md`)
```md
Some getting started stuff.
### Configuration
Can be created using `.foorc.json`.
```
**Equivalent code**
```md
# Docs
## Basics
Some getting started stuff.
### Configuration
Can be created using `.foorc.json`.
```
It also supports selecting a line range:
**Input**
```md:line-numbers
# Docs
## Basics
```
**Part file** (`parts/basics.md`)
```md:line-numbers
Some getting started stuff.
### Configuration
Can be created using `.foorc.json`.
```
**Equivalent code**
```md:line-numbers
# Docs
## Basics
### Configuration
Can be created using `.foorc.json`.
```
The format of the selected line range can be: `{3,}`, `{,10}`, `{1,10}`
You can also use a [VS Code region](https://code.visualstudio.com/docs/editor/codebasics#_folding) to only include the corresponding part of the code file. You can provide a custom region name after a `#` following the filepath:
**Input**
```md:line-numbers
# Docs
## Basics
```
**Part file** (`parts/basics.md`)
```md:line-numbers
## Usage Line 1
## Usage Line 2
## Usage Line 3
```
**Equivalent code**
```md:line-numbers
# Docs
## Basics
## Usage Line 1
## Usage Line 3
```
::: warning
Note that this does not throw errors if your file is not present. Hence, when using this feature make sure that the contents are being rendered as expected.
:::
Instead of VS Code regions, you can also use header anchors to include a specific section of the file. For example, if you have a header in your markdown file like this:
```md
## My Base Section
Some content here.
### My Sub Section
Some more content here.
## Another Section
Content outside `My Base Section`.
```
You can include the `My Base Section` section like this:
```md
## My Extended Section
```
**Equivalent code**
```md
## My Extended Section
Some content here.
### My Sub Section
Some more content here.
```
Here, `my-base-section` is the generated id of the heading element. In case it's not easily guessable, you can open the part file in your browser and click on the heading anchor (`#` symbol left to the heading when hovered) to see the id in the URL bar. Or use browser dev tools to inspect the element. Alternatively, you can also specify the id to the part file like this:
```md
## My Base Section {#custom-id}
```
and include it like this:
```md
```
## Math Equations
This is currently opt-in. To enable it, you need to install `markdown-it-mathjax3` and set `markdown.math` to `true` in your config file:
```sh
npm add -D markdown-it-mathjax3@^4
```
```ts [.vitepress/config.ts]
export default {
markdown: {
math: true
}
}
```
**Input**
```md
When $a \ne 0$, there are two solutions to $(ax^2 + bx + c = 0)$ and they are
$$ x = {-b \pm \sqrt{b^2-4ac} \over 2a} $$
**Maxwell's equations:**
| equation | description |
| ------------------------------------------------------------------------------------------------------------------------------------------------------------------------- | -------------------------------------------------------------------------------------- |
| $\nabla \cdot \vec{\mathbf{B}} = 0$ | divergence of $\vec{\mathbf{B}}$ is zero |
| $\nabla \times \vec{\mathbf{E}}\, +\, \frac1c\, \frac{\partial\vec{\mathbf{B}}}{\partial t} = \vec{\mathbf{0}}$ | curl of $\vec{\mathbf{E}}$ is proportional to the rate of change of $\vec{\mathbf{B}}$ |
| $\nabla \times \vec{\mathbf{B}} -\, \frac1c\, \frac{\partial\vec{\mathbf{E}}}{\partial t} = \frac{4\pi}{c}\vec{\mathbf{j}} \nabla \cdot \vec{\mathbf{E}} = 4 \pi \rho$ | _wha?_ |
```
**Output**
When $a \ne 0$, there are two solutions to $(ax^2 + bx + c = 0)$ and they are
$$ x = {-b \pm \sqrt{b^2-4ac} \over 2a} $$
**Maxwell's equations:**
| equation | description |
| ------------------------------------------------------------------------------------------------------------------------------------------------------------------------- | -------------------------------------------------------------------------------------- |
| $\nabla \cdot \vec{\mathbf{B}} = 0$ | divergence of $\vec{\mathbf{B}}$ is zero |
| $\nabla \times \vec{\mathbf{E}}, +, \frac1c, \frac{\partial\vec{\mathbf{B}}}{\partial t} = \vec{\mathbf{0}}$ | curl of $\vec{\mathbf{E}}$ is proportional to the rate of change of $\vec{\mathbf{B}}$ |
| $\nabla \times \vec{\mathbf{B}} -, \frac1c, \frac{\partial\vec{\mathbf{E}}}{\partial t} = \frac{4\pi}{c}\vec{\mathbf{j}} \nabla \cdot \vec{\mathbf{E}} = 4 \pi \rho$ | *wha?* |
## Image Lazy Loading
You can enable lazy loading for each image added via markdown by setting `lazyLoading` to `true` in your config file:
```js
export default {
markdown: {
image: {
// image lazy loading is disabled by default
lazyLoading: true
}
}
}
```
## Advanced Configuration
VitePress uses [markdown-it](https://github.com/markdown-it/markdown-it) as the Markdown renderer. A lot of the extensions above are implemented via custom plugins. You can further customize the `markdown-it` instance using the `markdown` option in `.vitepress/config.js`:
```js
import { defineConfig } from 'vitepress'
import markdownItAnchor from 'markdown-it-anchor'
import markdownItFoo from 'markdown-it-foo'
export default defineConfig({
markdown: {
// options for markdown-it-anchor
// https://github.com/valeriangalliat/markdown-it-anchor#usage
anchor: {
permalink: markdownItAnchor.permalink.headerLink()
},
// options for @mdit-vue/plugin-toc
// https://github.com/mdit-vue/mdit-vue/tree/main/packages/plugin-toc#options
toc: { level: [1, 2] },
config: (md) => {
// use more markdown-it plugins!
md.use(markdownItFoo)
}
}
})
```
See full list of configurable properties in [Config Reference: App Config](../reference/site-config#markdown).
---
---
url: /guide/migration-from-vitepress-0.md
---
# Migration from VitePress 0.x
If you're coming from VitePress 0.x version, there're several breaking changes due to new features and enhancement. Please follow this guide to see how to migrate your app over to the latest VitePress.
## App Config
* The internationalization feature is not yet implemented.
## Theme Config
* `sidebar` option has changed its structure.
* `children` key is now named `items`.
* Top level item may not contain `link` at the moment. We're planning to bring it back.
* `repo`, `repoLabel`, `docsDir`, `docsBranch`, `editLinks`, `editLinkText` are removed in favor of more flexible api.
* For adding GitHub link with icon to the nav, use [Social Links](../reference/default-theme-nav#navigation-links) feature.
* For adding "Edit this page" feature, use [Edit Link](../reference/default-theme-edit-link) feature.
* `lastUpdated` option is now split into `config.lastUpdated` and `themeConfig.lastUpdatedText`.
* `carbonAds.carbon` is changed to `carbonAds.code`.
## Frontmatter Config
* `home: true` option has changed to `layout: home`. Also, many Homepage related settings have been modified to provide additional features. See [Home Page guide](../reference/default-theme-home-page) for details.
* `footer` option is moved to [`themeConfig.footer`](../reference/default-theme-config#footer).
---
---
url: /guide/migration-from-vuepress.md
---
# Migration from VuePress
## Config
### Sidebar
The sidebar is no longer automatically populated from frontmatter. You can [read the frontmatter yourself](https://github.com/vuejs/vitepress/issues/572#issuecomment-1170116225) to dynamically populate the sidebar. [Additional utilities for this](https://github.com/vuejs/vitepress/issues/96) may be provided in the future.
## Markdown
### Images
Unlike VuePress, VitePress handles [`base`](./asset-handling#base-url) of your config automatically when you use static image.
Hence, now you can render images without `img` tag.
```diff
- ![foo]() + 
```
::: warning
For dynamic images you still need `withBase` as shown in [Base URL guide](./asset-handling#base-url).
:::
Use `
+ 
```
::: warning
For dynamic images you still need `withBase` as shown in [Base URL guide](./asset-handling#base-url).
:::
Use `` regex to find and replace it with `` to replace all the images with `` syntax.
***
more to follow...
---
---
url: /guide/mpa-mode.md
---
# MPA Mode
MPA (Multi-Page Application) mode can be enabled via the command line via `vitepress build --mpa`, or via config through the `mpa: true` option.
In MPA mode, all pages are rendered without any JavaScript included by default. As a result, the production site will likely have a better initial visit performance score from audit tools.
However, due to the absence of SPA navigation, cross-page links will lead to full page reloads. Post-load navigations in MPA mode will not feel as instant as in SPA mode.
Also note that no-JS-by-default means you are essentially using Vue purely as a server-side templating language. No event handlers will be attached in the browser, so there will be no interactivity. To load client-side JavaScript, you will need to use the special `
# Hello
```
`
```
### Rendering Raw Content
Params passed to the page will be serialized in the client JavaScript payload, so you should avoid passing heavy data in params, for example raw Markdown or HTML content fetched from a remote CMS.
Instead, you can pass such content to each page using the `content` property on each path object:
```js
export default {
async paths() {
const posts = await (await fetch('https://my-cms.com/blog-posts')).json()
return posts.map((post) => {
return {
params: { id: post.id },
content: post.content // raw Markdown or HTML
}
})
}
}
```
Then, use the following special syntax to render the content as part of the Markdown file itself:
```md
```
---
---
url: /reference/runtime-api.md
---
# Runtime API
VitePress offers several built-in APIs to let you access app data. VitePress also comes with a few built-in components that can be used globally.
The helper methods are globally importable from `vitepress` and are typically used in custom theme Vue components. However, they are also usable inside `.md` pages because markdown files are compiled into Vue [Single-File Components](https://vuejs.org/guide/scaling-up/sfc.html).
Methods that start with `use*` indicates that it is a [Vue 3 Composition API](https://vuejs.org/guide/introduction.html#composition-api) function ("Composable") that can only be used inside `setup()` or `
{{ theme.footer.copyright }}
```
## `useRoute`
Returns the current route object with the following type:
```ts
interface Route {
path: string
data: PageData
component: Component | null
}
```
## `useRouter`
Returns the VitePress router instance so you can programmatically navigate to another page.
```ts
interface Router {
/**
* Current route.
*/
route: Route
/**
* Navigate to a new URL.
*/
go: (to?: string) => Promise
/**
* Called before the route changes. Return `false` to cancel the navigation.
*/
onBeforeRouteChange?: (to: string) => Awaitable
/**
* Called before the page component is loaded (after the history state is updated).
* Return `false` to cancel the navigation.
*/
onBeforePageLoad?: (to: string) => Awaitable
/**
* Called after the page component is loaded (before the page component is updated).
*/
onAfterPageLoad?: (to: string) => Awaitable
/**
* Called after the route changes.
*/
onAfterRouteChange?: (to: string) => Awaitable
}
```
## `withBase`
* **Type**: `(path: string) => string`
Appends the configured [`base`](./site-config#base) to a given URL path. Also see [Base URL](../guide/asset-handling#base-url).
## `Custom Layout!
```
* Related: [SSR Compatibility](../guide/ssr-compat)
## `$frontmatter`
Directly access current page's [frontmatter](../guide/frontmatter) data in Vue expressions.
```md
---
title: Hello
---
# {{ $frontmatter.title }}
```
## `$params`
Directly access current page's [dynamic route params](../guide/routing#dynamic-routes) in Vue expressions.
```md
- package name: {{ $params.pkg }}
- version: {{ $params.version }}
```
---
---
url: /reference/default-theme-search.md
---
# Search
## Local Search
VitePress supports fuzzy full-text search using an in-browser index thanks to [minisearch](https://github.com/lucaong/minisearch/). To enable this feature, simply set the `themeConfig.search.provider` option to `'local'` in your `.vitepress/config.ts` file:
```ts
import { defineConfig } from 'vitepress'
export default defineConfig({
themeConfig: {
search: {
provider: 'local'
}
}
})
```
Example result:
Alternatively, you can use [Algolia DocSearch](#algolia-search) or some community plugins like:
*
*
*
### i18n {#local-search-i18n}
You can use a config like this to use multilingual search:
```ts
import { defineConfig } from 'vitepress'
export default defineConfig({
themeConfig: {
search: {
provider: 'local',
options: {
locales: {
zh: { // make this `root` if you want to translate the default locale
translations: {
button: {
buttonText: '搜索',
buttonAriaLabel: '搜索'
},
modal: {
displayDetails: '显示详细列表',
resetButtonTitle: '重置搜索',
backButtonTitle: '关闭搜索',
noResultsText: '没有结果',
footer: {
selectText: '选择',
selectKeyAriaLabel: '输入',
navigateText: '导航',
navigateUpKeyAriaLabel: '上箭头',
navigateDownKeyAriaLabel: '下箭头',
closeText: '关闭',
closeKeyAriaLabel: 'esc'
}
}
}
}
}
}
}
}
})
```
### miniSearch options
You can configure MiniSearch like this:
```ts
import { defineConfig } from 'vitepress'
export default defineConfig({
themeConfig: {
search: {
provider: 'local',
options: {
miniSearch: {
/**
* @type {Pick}
*/
options: {
/* ... */
},
/**
* @type {import('minisearch').SearchOptions}
* @default
* { fuzzy: 0.2, prefix: true, boost: { title: 4, text: 2, titles: 1 } }
*/
searchOptions: {
/* ... */
}
}
}
}
}
})
```
Learn more in [MiniSearch docs](https://lucaong.github.io/minisearch/classes/MiniSearch.MiniSearch.html).
### Custom content renderer
You can customize the function used to render the markdown content before indexing it:
```ts
import { defineConfig } from 'vitepress'
export default defineConfig({
themeConfig: {
search: {
provider: 'local',
options: {
/**
* @param {string} src
* @param {import('vitepress').MarkdownEnv} env
* @param {import('markdown-it-async')} md
*/
async _render(src, env, md) {
// return html string
}
}
}
}
})
```
This function will be stripped from client-side site data, so you can use Node.js APIs in it.
#### Example: Excluding pages from search
You can exclude pages from search by adding `search: false` to the frontmatter of the page. Alternatively:
```ts
import { defineConfig } from 'vitepress'
export default defineConfig({
themeConfig: {
search: {
provider: 'local',
options: {
async _render(src, env, md) {
const html = await md.renderAsync(src, env)
if (env.frontmatter?.search === false) return ''
if (env.relativePath.startsWith('some/path')) return ''
return html
}
}
}
}
})
```
::: warning Note
In case a custom `_render` function is provided, you need to handle the `search: false` frontmatter yourself. Also, the `env` object won't be completely populated before `md.renderAsync` is called, so any checks on optional `env` properties like `frontmatter` should be done after that.
:::
#### Example: Transforming content - adding anchors
```ts
import { defineConfig } from 'vitepress'
export default defineConfig({
themeConfig: {
search: {
provider: 'local',
options: {
async _render(src, env, md) {
const html = await md.renderAsync(src, env)
if (env.frontmatter?.title)
return await md.renderAsync(`# ${env.frontmatter.title}`) + html
return html
}
}
}
}
})
```
## Algolia Search
VitePress supports searching your docs site using [Algolia DocSearch](https://docsearch.algolia.com/docs/what-is-docsearch). Refer their getting started guide. In your `.vitepress/config.ts` you'll need to provide at least the following to make it work:
```ts
import { defineConfig } from 'vitepress'
export default defineConfig({
themeConfig: {
search: {
provider: 'algolia',
options: {
appId: '...',
apiKey: '...',
indexName: '...'
}
}
}
})
```
### i18n {#algolia-search-i18n}
You can use a config like this to use multilingual search:
```ts
import { defineConfig } from 'vitepress'
export default defineConfig({
themeConfig: {
search: {
provider: 'algolia',
options: {
appId: '...',
apiKey: '...',
indexName: '...',
locales: {
zh: {
placeholder: '搜索文档',
translations: {
button: {
buttonText: '搜索文档',
buttonAriaLabel: '搜索文档'
},
modal: {
searchBox: {
clearButtonTitle: '清除查询条件',
clearButtonAriaLabel: '清除查询条件',
closeButtonText: '关闭',
closeButtonAriaLabel: '关闭',
placeholderText: '搜索文档',
placeholderTextAskAi: '向 AI 提问:',
placeholderTextAskAiStreaming: '回答中...',
searchInputLabel: '搜索',
backToKeywordSearchButtonText: '返回关键字搜索',
backToKeywordSearchButtonAriaLabel: '返回关键字搜索'
},
startScreen: {
recentSearchesTitle: '搜索历史',
noRecentSearchesText: '没有搜索历史',
saveRecentSearchButtonTitle: '保存至搜索历史',
removeRecentSearchButtonTitle: '从搜索历史中移除',
favoriteSearchesTitle: '收藏',
removeFavoriteSearchButtonTitle: '从收藏中移除',
recentConversationsTitle: '最近的对话',
removeRecentConversationButtonTitle: '从历史记录中删除对话'
},
errorScreen: {
titleText: '无法获取结果',
helpText: '你可能需要检查你的网络连接'
},
noResultsScreen: {
noResultsText: '无法找到相关结果',
suggestedQueryText: '你可以尝试查询',
reportMissingResultsText: '你认为该查询应该有结果?',
reportMissingResultsLinkText: '点击反馈'
},
resultsScreen: {
askAiPlaceholder: '向 AI 提问: '
},
askAiScreen: {
disclaimerText: '答案由 AI 生成,可能不准确,请自行验证。',
relatedSourcesText: '相关来源',
thinkingText: '思考中...',
copyButtonText: '复制',
copyButtonCopiedText: '已复制!',
copyButtonTitle: '复制',
likeButtonTitle: '赞',
dislikeButtonTitle: '踩',
thanksForFeedbackText: '感谢你的反馈!',
preToolCallText: '搜索中...',
duringToolCallText: '搜索 ',
afterToolCallText: '已搜索'
},
footer: {
selectText: '选择',
submitQuestionText: '提交问题',
selectKeyAriaLabel: 'Enter 键',
navigateText: '切换',
navigateUpKeyAriaLabel: '向上箭头',
navigateDownKeyAriaLabel: '向下箭头',
closeText: '关闭',
backToSearchText: '返回搜索',
closeKeyAriaLabel: 'Esc 键',
poweredByText: '搜索提供者'
}
}
}
}
}
}
}
}
})
```
[These options](https://github.com/vuejs/vitepress/blob/main/types/docsearch.d.ts) can be overridden. Refer official Algolia docs to learn more about them.
### Algolia Ask AI Support {#ask-ai}
If you would like to include **Ask AI**, pass the `askAi` option (or any of the partial fields) inside `options`:
```ts
import { defineConfig } from 'vitepress'
export default defineConfig({
themeConfig: {
search: {
provider: 'algolia',
options: {
appId: '...',
apiKey: '...',
indexName: '...',
// askAi: "YOUR-ASSISTANT-ID"
// OR
askAi: {
// at minimum you must provide the assistantId you received from Algolia
assistantId: 'XXXYYY',
// optional overrides – if omitted, the top-level appId/apiKey/indexName values are reused
// apiKey: '...',
// appId: '...',
// indexName: '...'
}
}
}
}
})
```
::: warning Note
If want to default to keyword search and do not want to use Ask AI, just omit the `askAi` property
:::
The translations for the Ask AI UI live under `options.translations.modal.askAiScreen` and `options.translations.resultsScreen` — see the [type definitions](https://github.com/vuejs/vitepress/blob/main/types/docsearch.d.ts) for all keys.
### Crawler Config
Here is an example config based on what this site uses:
```ts
new Crawler({
appId: '...',
apiKey: '...',
rateLimit: 8,
startUrls: ['https://vitepress.dev/'],
renderJavaScript: false,
sitemaps: [],
exclusionPatterns: [],
ignoreCanonicalTo: false,
discoveryPatterns: ['https://vitepress.dev/**'],
schedule: 'at 05:10 on Saturday',
actions: [
{
indexName: 'vitepress',
pathsToMatch: ['https://vitepress.dev/**'],
recordExtractor: ({ $, helpers }) => {
return helpers.docsearch({
recordProps: {
lvl1: '.content h1',
content: '.content p, .content li',
lvl0: {
selectors: 'section.has-active div h2',
defaultValue: 'Documentation'
},
lvl2: '.content h2',
lvl3: '.content h3',
lvl4: '.content h4',
lvl5: '.content h5'
},
indexHeadings: true
})
}
}
],
initialIndexSettings: {
vitepress: {
attributesForFaceting: ['type', 'lang'],
attributesToRetrieve: ['hierarchy', 'content', 'anchor', 'url'],
attributesToHighlight: ['hierarchy', 'hierarchy_camel', 'content'],
attributesToSnippet: ['content:10'],
camelCaseAttributes: ['hierarchy', 'hierarchy_radio', 'content'],
searchableAttributes: [
'unordered(hierarchy_radio_camel.lvl0)',
'unordered(hierarchy_radio.lvl0)',
'unordered(hierarchy_radio_camel.lvl1)',
'unordered(hierarchy_radio.lvl1)',
'unordered(hierarchy_radio_camel.lvl2)',
'unordered(hierarchy_radio.lvl2)',
'unordered(hierarchy_radio_camel.lvl3)',
'unordered(hierarchy_radio.lvl3)',
'unordered(hierarchy_radio_camel.lvl4)',
'unordered(hierarchy_radio.lvl4)',
'unordered(hierarchy_radio_camel.lvl5)',
'unordered(hierarchy_radio.lvl5)',
'unordered(hierarchy_radio_camel.lvl6)',
'unordered(hierarchy_radio.lvl6)',
'unordered(hierarchy_camel.lvl0)',
'unordered(hierarchy.lvl0)',
'unordered(hierarchy_camel.lvl1)',
'unordered(hierarchy.lvl1)',
'unordered(hierarchy_camel.lvl2)',
'unordered(hierarchy.lvl2)',
'unordered(hierarchy_camel.lvl3)',
'unordered(hierarchy.lvl3)',
'unordered(hierarchy_camel.lvl4)',
'unordered(hierarchy.lvl4)',
'unordered(hierarchy_camel.lvl5)',
'unordered(hierarchy.lvl5)',
'unordered(hierarchy_camel.lvl6)',
'unordered(hierarchy.lvl6)',
'content'
],
distinct: true,
attributeForDistinct: 'url',
customRanking: [
'desc(weight.pageRank)',
'desc(weight.level)',
'asc(weight.position)'
],
ranking: [
'words',
'filters',
'typo',
'attribute',
'proximity',
'exact',
'custom'
],
highlightPreTag: '',
highlightPostTag: '',
minWordSizefor1Typo: 3,
minWordSizefor2Typos: 7,
allowTyposOnNumericTokens: false,
minProximity: 1,
ignorePlurals: true,
advancedSyntax: true,
attributeCriteriaComputedByMinProximity: true,
removeWordsIfNoResults: 'allOptional'
}
}
})
```
---
---
url: /reference/default-theme-sidebar.md
---
# Sidebar
The sidebar is the main navigation block for your documentation. You can configure the sidebar menu in [`themeConfig.sidebar`](./default-theme-config#sidebar).
```js
export default {
themeConfig: {
sidebar: [
{
text: 'Guide',
items: [
{ text: 'Introduction', link: '/introduction' },
{ text: 'Getting Started', link: '/getting-started' },
...
]
}
]
}
}
```
## The Basics
The simplest form of the sidebar menu is passing in a single array of links. The first level item defines the "section" for the sidebar. It should contain `text`, which is the title of the section, and `items` which are the actual navigation links.
```js
export default {
themeConfig: {
sidebar: [
{
text: 'Section Title A',
items: [
{ text: 'Item A', link: '/item-a' },
{ text: 'Item B', link: '/item-b' },
...
]
},
{
text: 'Section Title B',
items: [
{ text: 'Item C', link: '/item-c' },
{ text: 'Item D', link: '/item-d' },
...
]
}
]
}
}
```
Each `link` should specify the path to the actual file starting with `/`. If you add trailing slash to the end of link, it will show `index.md` of the corresponding directory.
```js
export default {
themeConfig: {
sidebar: [
{
text: 'Guide',
items: [
// This shows `/guide/index.md` page.
{ text: 'Introduction', link: '/guide/' }
]
}
]
}
}
```
You may further nest the sidebar items up to 6 level deep counting up from the root level. Note that deeper than 6 level of nested items gets ignored and will not be displayed on the sidebar.
```js
export default {
themeConfig: {
sidebar: [
{
text: 'Level 1',
items: [
{
text: 'Level 2',
items: [
{
text: 'Level 3',
items: [
...
]
}
]
}
]
}
]
}
}
```
## Multiple Sidebars
You may show different sidebar depending on the page path. For example, as shown on this site, you might want to create a separate sections of content in your documentation like "Guide" page and "Config" page.
To do so, first organize your pages into directories for each desired section:
```
.
├─ guide/
│ ├─ index.md
│ ├─ one.md
│ └─ two.md
└─ config/
├─ index.md
├─ three.md
└─ four.md
```
Then, update your configuration to define your sidebar for each section. This time, you should pass an object instead of an array.
```js
export default {
themeConfig: {
sidebar: {
// This sidebar gets displayed when a user
// is on `guide` directory.
'/guide/': [
{
text: 'Guide',
items: [
{ text: 'Index', link: '/guide/' },
{ text: 'One', link: '/guide/one' },
{ text: 'Two', link: '/guide/two' }
]
}
],
// This sidebar gets displayed when a user
// is on `config` directory.
'/config/': [
{
text: 'Config',
items: [
{ text: 'Index', link: '/config/' },
{ text: 'Three', link: '/config/three' },
{ text: 'Four', link: '/config/four' }
]
}
]
}
}
}
```
## Collapsible Sidebar Groups
By adding `collapsed` option to the sidebar group, it shows a toggle button to hide/show each section.
```js
export default {
themeConfig: {
sidebar: [
{
text: 'Section Title A',
collapsed: false,
items: [...]
}
]
}
}
```
All sections are "open" by default. If you would like them to be "closed" on initial page load, set `collapsed` option to `true`.
```js
export default {
themeConfig: {
sidebar: [
{
text: 'Section Title A',
collapsed: true,
items: [...]
}
]
}
}
```
---
---
url: /reference/site-config.md
---
# Site Config
Site config is where you can define the global settings of the site. App config options define settings that apply to every VitePress site, regardless of what theme it is using. For example, the base directory or the title of the site.
## Overview
### Config Resolution
The config file is always resolved from `/.vitepress/config.[ext]`, where `` is your VitePress [project root](../guide/routing#root-and-source-directory), and `[ext]` is one of the supported file extensions. TypeScript is supported out of the box. Supported extensions include `.js`, `.ts`, `.mjs`, and `.mts`.
It is recommended to use ES modules syntax in config files. The config file should default export an object:
```ts
export default {
// app level config options
lang: 'en-US',
title: 'VitePress',
description: 'Vite & Vue powered static site generator.',
...
}
```
::: details Dynamic (Async) Config
If you need to dynamically generate the config, you can also default export a function. For example:
```ts
import { defineConfig } from 'vitepress'
export default async () => {
const posts = await (await fetch('https://my-cms.com/blog-posts')).json()
return defineConfig({
// app level config options
lang: 'en-US',
title: 'VitePress',
description: 'Vite & Vue powered static site generator.',
// theme level config options
themeConfig: {
sidebar: [
...posts.map((post) => ({
text: post.name,
link: `/posts/${post.name}`
}))
]
}
})
}
```
You can also use top-level `await`. For example:
```ts
import { defineConfig } from 'vitepress'
const posts = await (await fetch('https://my-cms.com/blog-posts')).json()
export default defineConfig({
// app level config options
lang: 'en-US',
title: 'VitePress',
description: 'Vite & Vue powered static site generator.',
// theme level config options
themeConfig: {
sidebar: [
...posts.map((post) => ({
text: post.name,
link: `/posts/${post.name}`
}))
]
}
})
```
:::
### Config Intellisense
Using the `defineConfig` helper will provide TypeScript-powered intellisense for config options. Assuming your IDE supports it, this should work in both JavaScript and TypeScript.
```js
import { defineConfig } from 'vitepress'
export default defineConfig({
// ...
})
```
### Typed Theme Config
By default, `defineConfig` helper expects the theme config type from default theme:
```ts
import { defineConfig } from 'vitepress'
export default defineConfig({
themeConfig: {
// Type is `DefaultTheme.Config`
}
})
```
If you use a custom theme and want type checks for the theme config, you'll need to use `defineConfigWithTheme` instead, and pass the config type for your custom theme via a generic argument:
```ts
import { defineConfigWithTheme } from 'vitepress'
import type { ThemeConfig } from 'your-theme'
export default defineConfigWithTheme({
themeConfig: {
// Type is `ThemeConfig`
}
})
```
### Vite, Vue & Markdown Config
* **Vite**
You can configure the underlying Vite instance using the [vite](#vite) option in your VitePress config. No need to create a separate Vite config file.
* **Vue**
VitePress already includes the official Vue plugin for Vite ([@vitejs/plugin-vue](https://github.com/vitejs/vite-plugin-vue)). You can configure its options using the [vue](#vue) option in your VitePress config.
* **Markdown**
You can configure the underlying [Markdown-It](https://github.com/markdown-it/markdown-it) instance using the [markdown](#markdown) option in your VitePress config.
## Site Metadata
### title
* Type: `string`
* Default: `VitePress`
* Can be overridden per page via [frontmatter](./frontmatter-config#title)
Title for the site. When using the default theme, this will be displayed in the nav bar.
It will also be used as the default suffix for all individual page titles, unless [`titleTemplate`](#titletemplate) is defined. An individual page's final title will be the text content of its first `` header, combined with the global `title` as the suffix. For example with the following config and page content:
```ts
export default {
title: 'My Awesome Site'
}
```
```md
# Hello
```
The title of the page will be `Hello | My Awesome Site`.
### titleTemplate
* Type: `string | boolean`
* Can be overridden per page via [frontmatter](./frontmatter-config#titletemplate)
Allows customizing each page's title suffix or the entire title. For example:
```ts
export default {
title: 'My Awesome Site',
titleTemplate: 'Custom Suffix'
}
```
```md
# Hello
```
The title of the page will be `Hello | Custom Suffix`.
To completely customize how the title should be rendered, you can use the `:title` symbol in `titleTemplate`:
```ts
export default {
titleTemplate: ':title - Custom Suffix'
}
```
Here `:title` will be replaced with the text inferred from the page's first `` header. The title of the previous example page will be `Hello - Custom Suffix`.
The option can be set to `false` to disable title suffixes.
### description
* Type: `string`
* Default: `A VitePress site`
* Can be overridden per page via [frontmatter](./frontmatter-config#description)
Description for the site. This will render as a `` tag in the page HTML.
```ts
export default {
description: 'A VitePress site'
}
```
### head
* Type: `HeadConfig[]`
* Default: `[]`
* Can be appended per page via [frontmatter](./frontmatter-config#head)
Additional elements to render in the `` tag in the page HTML. The user-added tags are rendered before the closing `head` tag, after VitePress tags.
```ts
type HeadConfig =
| [string, Record]
| [string, Record, string]
```
#### Example: Adding a favicon
```ts
export default {
head: [['link', { rel: 'icon', href: '/favicon.ico' }]]
} // put favicon.ico in public directory, if base is set, use /base/favicon.ico
/* Would render:
*/
```
#### Example: Adding Google Fonts
```ts
export default {
head: [
[
'link',
{ rel: 'preconnect', href: 'https://fonts.googleapis.com' }
],
[
'link',
{ rel: 'preconnect', href: 'https://fonts.gstatic.com', crossorigin: '' }
],
[
'link',
{ href: 'https://fonts.googleapis.com/css2?family=Roboto&display=swap', rel: 'stylesheet' }
]
]
}
/* Would render:
*/
```
#### Example: Registering a service worker
```ts
export default {
head: [
[
'script',
{ id: 'register-sw' },
`;(() => {
if ('serviceWorker' in navigator) {
navigator.serviceWorker.register('/sw.js')
}
})()`
]
]
}
/* Would render:
*/
```
#### Example: Using Google Analytics
```ts
export default {
head: [
[
'script',
{ async: '', src: 'https://www.googletagmanager.com/gtag/js?id=TAG_ID' }
],
[
'script',
{},
`window.dataLayer = window.dataLayer || [];
function gtag(){dataLayer.push(arguments);}
gtag('js', new Date());
gtag('config', 'TAG_ID');`
]
]
}
/* Would render:
*/
```
### lang
* Type: `string`
* Default: `en-US`
The lang attribute for the site. This will render as a `` tag in the page HTML.
```ts
export default {
lang: 'en-US'
}
```
### base
* Type: `string`
* Default: `/`
The base URL the site will be deployed at. You will need to set this if you plan to deploy your site under a sub path, for example, GitHub pages. If you plan to deploy your site to `https://foo.github.io/bar/`, then you should set base to `'/bar/'`. It should always start and end with a slash. Relative bases are not supported.
The base is automatically prepended to all the URLs that start with / in other options, so you only need to specify it once.
```ts
export default {
base: '/base/'
}
```
## Routing
### cleanUrls
* Type: `boolean`
* Default: `false`
When set to `true`, VitePress will remove the trailing `.html` from URLs. Also see [Generating Clean URL](../guide/routing#generating-clean-url).
::: warning Server Support Required
Enabling this may require additional configuration on your hosting platform. For it to work, your server must be able to serve `/foo.html` when visiting `/foo` **without a redirect**.
:::
### rewrites
* Type: `Record`
Defines custom directory <-> URL mappings. See [Routing: Route Rewrites](../guide/routing#route-rewrites) for more details.
```ts
export default {
rewrites: {
'source/:page': 'destination/:page'
}
}
```
## Build
### srcDir
* Type: `string`
* Default: `.`
The directory where your markdown pages are stored, relative to project root. Also see [Root and Source Directory](../guide/routing#root-and-source-directory).
```ts
export default {
srcDir: './src'
}
```
### srcExclude
* Type: `string[]`
* Default: `undefined`
A [glob pattern](https://github.com/mrmlnc/fast-glob#pattern-syntax) for matching markdown files that should be excluded as source content.
```ts
export default {
srcExclude: ['**/README.md', '**/TODO.md']
}
```
### outDir
* Type: `string`
* Default: `./.vitepress/dist`
The build output location for the site, relative to [project root](../guide/routing#root-and-source-directory).
```ts
export default {
outDir: '../public'
}
```
### assetsDir
* Type: `string`
* Default: `assets`
Specify the directory to nest generated assets under. The path should be inside [`outDir`](#outdir) and is resolved relative to it.
```ts
export default {
assetsDir: 'static'
}
```
### cacheDir
* Type: `string`
* Default: `./.vitepress/cache`
The directory for cache files, relative to [project root](../guide/routing#root-and-source-directory). See also: [cacheDir](https://vitejs.dev/config/shared-options.html#cachedir).
```ts
export default {
cacheDir: './.vitepress/.vite'
}
```
### ignoreDeadLinks
* Type: `boolean | 'localhostLinks' | (string | RegExp | ((link: string, source: string) => boolean))[]`
* Default: `false`
When set to `true`, VitePress will not fail builds due to dead links.
When set to `'localhostLinks'`, the build will fail on dead links, but won't check `localhost` links.
```ts
export default {
ignoreDeadLinks: true
}
```
It can also be an array of exact url string, regex patterns, or custom filter functions.
```ts
export default {
ignoreDeadLinks: [
// ignore exact url "/playground"
'/playground',
// ignore all localhost links
/^https?:\/\/localhost/,
// ignore all links include "/repl/""
/\/repl\//,
// custom function, ignore all links include "ignore"
(url) => {
return url.toLowerCase().includes('ignore')
}
]
}
```
### metaChunk
* Type: `boolean`
* Default: `false`
When set to `true`, extract pages metadata to a separate JavaScript chunk instead of inlining it in the initial HTML. This makes each page's HTML payload smaller and makes the pages metadata cacheable, thus reducing server bandwidth when you have many pages in the site.
### mpa
* Type: `boolean`
* Default: `false`
When set to `true`, the production app will be built in [MPA Mode](../guide/mpa-mode). MPA mode ships 0kb JavaScript by default, at the cost of disabling client-side navigation and requires explicit opt-in for interactivity.
## Theming
### appearance
* Type: `boolean | 'dark' | 'force-dark' | 'force-auto' | import('@vueuse/core').UseDarkOptions`
* Default: `true`
Whether to enable dark mode (by adding the `.dark` class to the `` element).
* If the option is set to `true`, the default theme will be determined by the user's preferred color scheme.
* If the option is set to `dark`, the theme will be dark by default, unless the user manually toggles it.
* If the option is set to `false`, users will not be able to toggle the theme.
* If the option is set to `'force-dark'`, the theme will always be dark and users will not be able to toggle it.
* If the option is set to `'force-auto'`, the theme will always be determined by the user's preferred color scheme and users will not be able to toggle it.
This option injects an inline script that restores users settings from local storage using the `vitepress-theme-appearance` key. This ensures the `.dark` class is applied before the page is rendered to avoid flickering.
`appearance.initialValue` can only be `'dark' | undefined`. Refs or getters are not supported.
### lastUpdated
* Type: `boolean`
* Default: `false`
Whether to get the last updated timestamp for each page using Git. The timestamp will be included in each page's page data, accessible via [`useData`](./runtime-api#usedata).
When using the default theme, enabling this option will display each page's last updated time. You can customize the text via [`themeConfig.lastUpdatedText`](./default-theme-config#lastupdatedtext) option.
## Customization
### markdown
* Type: `MarkdownOption`
Configure Markdown parser options. VitePress uses [Markdown-it](https://github.com/markdown-it/markdown-it) as the parser, and [Shiki](https://github.com/shikijs/shiki) to highlight language syntax. Inside this option, you may pass various Markdown related options to fit your needs.
```js
export default {
markdown: {...}
}
```
Check the [type declaration and jsdocs](https://github.com/vuejs/vitepress/blob/main/src/node/markdown/markdown.ts) for all the options available.
### vite
* Type: `import('vite').UserConfig`
Pass raw [Vite Config](https://vitejs.dev/config/) to internal Vite dev server / bundler.
```js
export default {
vite: {
// Vite config options
}
}
```
### vue
* Type: `import('@vitejs/plugin-vue').Options`
Pass raw [`@vitejs/plugin-vue` options](https://github.com/vitejs/vite-plugin-vue/tree/main/packages/plugin-vue#options) to the internal plugin instance.
```js
export default {
vue: {
// @vitejs/plugin-vue options
}
}
```
## Build Hooks
VitePress build hooks allow you to add new functionality and behaviors to your website:
* Sitemap
* Search Indexing
* PWA
* Teleports
### buildEnd
* Type: `(siteConfig: SiteConfig) => Awaitable`
`buildEnd` is a build CLI hook, it will run after build (SSG) finish but before VitePress CLI process exits.
```ts
export default {
async buildEnd(siteConfig) {
// ...
}
}
```
### postRender
* Type: `(context: SSGContext) => Awaitable`
`postRender` is a build hook, called when SSG rendering is done. It will allow you to handle the teleports content during SSG.
```ts
export default {
async postRender(context) {
// ...
}
}
```
```ts
interface SSGContext {
content: string
teleports?: Record
[key: string]: any
}
```
### transformHead
* Type: `(context: TransformContext) => Awaitable`
`transformHead` is a build hook to transform the head before generating each page. It will allow you to add head entries that cannot be statically added to your VitePress config. You only need to return extra entries, they will be merged automatically with the existing ones.
::: warning
Don't mutate anything inside the `context`.
:::
```ts
export default {
async transformHead(context) {
// ...
}
}
```
```ts
interface TransformContext {
page: string // e.g. index.md (relative to srcDir)
assets: string[] // all non-js/css assets as fully resolved public URL
siteConfig: SiteConfig
siteData: SiteData
pageData: PageData
title: string
description: string
head: HeadConfig[]
content: string
}
```
Note that this hook is only called when generating the site statically. It is not called during dev. If you need to add dynamic head entries during dev, you can use the [`transformPageData`](#transformpagedata) hook instead:
```ts
export default {
transformPageData(pageData) {
pageData.frontmatter.head ??= []
pageData.frontmatter.head.push([
'meta',
{
name: 'og:title',
content:
pageData.frontmatter.layout === 'home'
? `VitePress`
: `${pageData.title} | VitePress`
}
])
}
}
```
#### Example: Adding a canonical URL ``
```ts
export default {
transformPageData(pageData) {
const canonicalUrl = `https://example.com/${pageData.relativePath}`
.replace(/index\.md$/, '')
.replace(/\.md$/, '.html')
pageData.frontmatter.head ??= []
pageData.frontmatter.head.push([
'link',
{ rel: 'canonical', href: canonicalUrl }
])
}
}
```
### transformHtml
* Type: `(code: string, id: string, context: TransformContext) => Awaitable`
`transformHtml` is a build hook to transform the content of each page before saving to disk.
::: warning
Don't mutate anything inside the `context`. Also, modifying the html content may cause hydration problems in runtime.
:::
```ts
export default {
async transformHtml(code, id, context) {
// ...
}
}
```
### transformPageData
* Type: `(pageData: PageData, context: TransformPageContext) => Awaitable | { [key: string]: any } | void>`
`transformPageData` is a hook to transform the `pageData` of each page. You can directly mutate `pageData` or return changed values which will be merged into the page data.
::: warning
Don't mutate anything inside the `context` and be careful that this might impact the performance of dev server, especially if you have some network requests or heavy computations (like generating images) in the hook. You can check for `process.env.NODE_ENV === 'production'` for conditional logic.
:::
```ts
export default {
async transformPageData(pageData, { siteConfig }) {
pageData.contributors = await getPageContributors(pageData.relativePath)
}
// or return data to be merged
async transformPageData(pageData, { siteConfig }) {
return {
contributors: await getPageContributors(pageData.relativePath)
}
}
}
```
```ts
interface TransformPageContext {
siteConfig: SiteConfig
}
```
---
---
url: /guide/sitemap-generation.md
---
# Sitemap Generation
VitePress comes with out-of-the-box support for generating a `sitemap.xml` file for your site. To enable it, add the following to your `.vitepress/config.js`:
```ts
export default {
sitemap: {
hostname: 'https://example.com'
}
}
```
To have `` tags in your `sitemap.xml`, you can enable the [`lastUpdated`](../reference/default-theme-last-updated) option.
## Options
Sitemap support is powered by the [`sitemap`](https://www.npmjs.com/package/sitemap) module. You can pass any options supported by it to the `sitemap` option in your config file. These will be passed directly to the `SitemapStream` constructor. Refer to the [`sitemap` documentation](https://www.npmjs.com/package/sitemap#options-you-can-pass) for more details. Example:
```ts
export default {
sitemap: {
hostname: 'https://example.com',
lastmodDateOnly: false
}
}
```
If you're using `base` in your config, you should append it to the `hostname` option:
```ts
export default {
base: '/my-site/',
sitemap: {
hostname: 'https://example.com/my-site/'
}
}
```
## `transformItems` Hook
You can use the `sitemap.transformItems` hook to modify the sitemap items before they are written to the `sitemap.xml` file. This hook is called with an array of sitemap items and expects an array of sitemap items to be returned. Example:
```ts
export default {
sitemap: {
hostname: 'https://example.com',
transformItems: (items) => {
// add new items or modify/filter existing items
items.push({
url: '/extra-page',
changefreq: 'monthly',
priority: 0.8
})
return items
}
}
}
```
---
---
url: /guide/ssr-compat.md
---
# SSR Compatibility
VitePress pre-renders the app in Node.js during the production build, using Vue's Server-Side Rendering (SSR) capabilities. This means all custom code in theme components are subject to SSR Compatibility.
The [SSR section in official Vue docs](https://vuejs.org/guide/scaling-up/ssr.html) provides more context on what SSR is, the relationship between SSR / SSG, and common notes on writing SSR-friendly code. The rule of thumb is to only access browser / DOM APIs in `beforeMount` or `mounted` hooks of Vue components.
## ``
If you are using or demoing components that are not SSR-friendly (for example, contain custom directives), you can wrap them inside the built-in `` component:
```md
```
## Libraries that Access Browser API on Import
Some components or libraries access browser APIs **on import**. To use code that assumes a browser environment on import, you need to dynamically import them.
### Importing in Mounted Hook
```vue
```
### Conditional Import
You can also conditionally import a dependency using the `import.meta.env.SSR` flag (part of [Vite env variables](https://vitejs.dev/guide/env-and-mode.html#env-variables)):
```js
if (!import.meta.env.SSR) {
import('./lib-that-access-window-on-import').then((module) => {
// use code
})
}
```
Since [`Theme.enhanceApp`](./custom-theme#theme-interface) can be async, you can conditionally import and register Vue plugins that access browser APIs on import:
```js [.vitepress/theme/index.js]
/** @type {import('vitepress').Theme} */
export default {
// ...
async enhanceApp({ app }) {
if (!import.meta.env.SSR) {
const plugin = await import('plugin-that-access-window-on-import')
app.use(plugin.default)
}
}
}
```
If you're using TypeScript:
```ts [.vitepress/theme/index.ts]
import type { Theme } from 'vitepress'
export default {
// ...
async enhanceApp({ app }) {
if (!import.meta.env.SSR) {
const plugin = await import('plugin-that-access-window-on-import')
app.use(plugin.default)
}
}
} satisfies Theme
```
### `defineClientComponent`
VitePress provides a convenience helper for importing Vue components that access browser APIs on import.
```vue
` component exposed from `vitepress/theme` to display a list of team members on any page.
```html
# Our Team
Say hello to our awesome team.
` component comes in 2 different sizes, `small` and `medium`. While it boils down to your preference, usually `small` size should fit better when used in doc page. Also, you may add more properties to each member such as adding "description" or "sponsor" button. Learn more about it in [``](#vpteammembers).
Embedding team members in doc page is good for small size team where having dedicated full team page might be too much, or introducing partial members as a reference to documentation context.
If you have large number of members, or simply would like to have more space to show team members, consider [creating a full team page](#create-a-full-team-page).
## Create a full Team Page
Instead of adding team members to doc page, you may also create a full Team Page, similar to how you can create a custom [Home Page](./default-theme-home-page).
To create a team page, first, create a new md file. The file name doesn't matter, but here lets call it `team.md`. In this file, set frontmatter option `layout: page`, and then you may compose your page structure using `TeamPage` components.
```html
---
layout: page
---
Our Team
The development of VitePress is guided by an international
team, some of whom have chosen to be featured below.
```
When creating a full team page, remember to wrap all components with `` component. This component will ensure all nested team related components get the proper layout structure like spacings.
`` component adds the page title section. The title being `` heading. Use `#title` and `#lead` slot to document about your team.
`` works as same as when used in a doc page. It will display list of members.
### Add sections to divide team members
You may add "sections" to the team page. For example, you may have different types of team members such as Core Team Members and Community Partners. You can divide these members into sections to better explain the roles of each group.
To do so, add `` component to the `team.md` file we created previously.
```html
---
layout: page
---
Our Team
...
Partners
...
```
The `` component can have `#title` and `#lead` slot similar to `VPTeamPageTitle` component, and also `#members` slot for displaying team members.
Remember to put in `` component within `#members` slot.
## ``
The `` component displays a given list of members.
```html
`
The root component when creating a full team page. It only accepts a single slot. It will style all passed in team related components.
## ``
Adds "title" section of the page. Best use at the very beginning under ``. It accepts `#title` and `#lead` slot.
```html
Our Team
The development of VitePress is guided by an international
team, some of whom have chosen to be featured below.
```
## ``
Creates a "section" with in team page. It accepts `#title`, `#lead`, and `#members` slot. You may add as many sections as you like inside ``.
```html
...
Partners
Lorem ipsum...
```
---
---
url: /guide/custom-theme.md
---
# Using a Custom Theme
## Theme Resolving
You can enable a custom theme by creating a `.vitepress/theme/index.js` or `.vitepress/theme/index.ts` file (the "theme entry file"):
```
.
├─ docs # project root
│ ├─ .vitepress
│ │ ├─ theme
│ │ │ └─ index.js # theme entry
│ │ └─ config.js # config file
│ └─ index.md
└─ package.json
```
VitePress will always use the custom theme instead of the default theme when it detects presence of a theme entry file. You can, however, [extend the default theme](./extending-default-theme) to perform advanced customizations on top of it.
## Theme Interface
A VitePress custom theme is defined as an object with the following interface:
```ts
interface Theme {
/**
* Root layout component for every page
* @required
*/
Layout: Component
/**
* Enhance Vue app instance
* @optional
*/
enhanceApp?: (ctx: EnhanceAppContext) => Awaitable
/**
* Extend another theme, calling its `enhanceApp` before ours
* @optional
*/
extends?: Theme
}
interface EnhanceAppContext {
app: App // Vue app instance
router: Router // VitePress router instance
siteData: Ref // Site-level metadata
}
```
The theme entry file should export the theme as its default export:
```js [.vitepress/theme/index.js]
// You can directly import Vue files in the theme entry
// VitePress is pre-configured with @vitejs/plugin-vue.
import Layout from './Layout.vue'
export default {
Layout,
enhanceApp({ app, router, siteData }) {
// ...
}
}
```
The default export is the only contract for a custom theme, and only the `Layout` property is required. So technically, a VitePress theme can be as simple as a single Vue component.
Inside your layout component, it works just like a normal Vite + Vue 3 application. Do note the theme also needs to be [SSR-compatible](./ssr-compat).
## Building a Layout
The most basic layout component needs to contain a [`Custom Layout!
Custom Layout!
Custom 404 page!
Custom Layout!
Custom 404 page!
Custom home page!
Custom Layout!
({
extends: baseConfig,
themeConfig: {
// Type is `ThemeConfig`
}
})
```
---
---
url: /guide/using-vue.md
---
# Using Vue in Markdown
In VitePress, each Markdown file is compiled into HTML and then processed as a [Vue Single-File Component](https://vuejs.org/guide/scaling-up/sfc.html). This means you can use any Vue features inside the Markdown, including dynamic templating, using Vue components, or arbitrary in-page Vue component logic by adding a `
## Markdown Content
The count is: {{ count }}
```
::: warning Avoid `
```
## Using Teleports
VitePress currently has SSG support for teleports to body only. For other targets, you can wrap them inside the built-in `` component or inject the teleport markup into the correct location in your final page HTML through [`postRender` hook](../reference/site-config#postrender).
::: details
<<< @/components/ModalDemo.vue
:::
```md
// ...
```
## VS Code IntelliSense Support
Vue provides IntelliSense support out of the box via the [Vue - Official VS Code plugin](https://marketplace.visualstudio.com/items?itemName=Vue.volar). However, to enable it for `.md` files, you need to make some adjustments to the configuration files.
1. Add `.md` pattern to the `include` and `vueCompilerOptions.vitePressExtensions` options in the tsconfig/jsconfig file:
::: code-group
```json [tsconfig.json]
{
"include": [
"docs/**/*.ts",
"docs/**/*.vue",
"docs/**/*.md",
],
"vueCompilerOptions": {
"vitePressExtensions": [".md"],
},
}
```
:::
2. Add `markdown` to the `vue.server.includeLanguages` option in the VS Code setting:
::: code-group
```json [.vscode/settings.json]
{
"vue.server.includeLanguages": ["vue", "markdown"]
}
```
:::
---
---
url: /guide/what-is-vitepress.md
---
# What is VitePress?
VitePress is a [Static Site Generator](https://en.wikipedia.org/wiki/Static_site_generator) (SSG) designed for building fast, content-centric websites. In a nutshell, VitePress takes your source content written in [Markdown](https://en.wikipedia.org/wiki/Markdown), applies a theme to it, and generates static HTML pages that can be easily deployed anywhere.
Just want to try it out? Skip to the [Quickstart](./getting-started).
## Use Cases
* **Documentation**
VitePress ships with a default theme designed for technical documentation. It powers this page you are reading right now, along with the documentation for [Vite](https://vitejs.dev/), [Rollup](https://rollupjs.org/), [Pinia](https://pinia.vuejs.org/), [VueUse](https://vueuse.org/), [Vitest](https://vitest.dev/), [D3](https://d3js.org/), [UnoCSS](https://unocss.dev/), [Iconify](https://iconify.design/) and [many more](https://github.com/search?q=/%22vitepress%22:+/+path:/\(?:package%7Cdeno\)%5C.jsonc?$/+NOT+is:fork+NOT+is:archived\&type=code).
The [official Vue.js documentation](https://vuejs.org/) is also based on VitePress, but uses a custom theme shared between multiple translations.
* **Blogs, Portfolios, and Marketing Sites**
VitePress supports [fully customized themes](./custom-theme), with the developer experience of a standard Vite + Vue application. Being built on Vite also means you can directly leverage Vite plugins from its rich ecosystem. In addition, VitePress provides flexible APIs to [load data](./data-loading) (local or remote) and [dynamically generate routes](./routing#dynamic-routes). You can use it to build almost anything as long as the data can be determined at build time.
The official [Vue.js blog](https://blog.vuejs.org/) is a simple blog that generates its index page based on local content.
## Developer Experience
VitePress aims to provide a great Developer Experience (DX) when working with Markdown content.
* **[Vite-Powered:](https://vitejs.dev/)** instant server start, with edits always instantly reflected (<100ms) without page reload.
* **[Built-in Markdown Extensions:](./markdown)** Frontmatter, tables, syntax highlighting... you name it. Specifically, VitePress provides many advanced features for working with code blocks, making it ideal for highly technical documentation.
* **[Vue-Enhanced Markdown:](./using-vue)** each Markdown page is also a Vue [Single-File Component](https://vuejs.org/guide/scaling-up/sfc.html), thanks to Vue template's 100% syntax compatibility with HTML. You can embed interactivity in your static content using Vue templating features or imported Vue components.
## Performance
Unlike many traditional SSGs where each navigation results in a full page reload, a website generated by VitePress serves static HTML on the initial visit, but becomes a [Single Page Application](https://en.wikipedia.org/wiki/Single-page_application) (SPA) for subsequent navigation within the site. This model, in our opinion, provides an optimal balance for performance:
* **Fast Initial Load**
The initial visit to any page will be served the static, pre-rendered HTML for fast loading speed and optimal SEO. The page then loads a JavaScript bundle that turns the page into a Vue SPA ("hydration"). Contrary to common assumptions of SPA hydration being slow, this process is actually extremely fast thanks to Vue 3's raw performance and compiler optimizations. On [PageSpeed Insights](https://pagespeed.web.dev/report?url=https%3A%2F%2Fvitepress.dev%2F), typical VitePress sites achieve near-perfect performance scores even on low-end mobile devices with a slow network.
* **Fast Post-load Navigation**
More importantly, the SPA model leads to better user experience **after** the initial load. Subsequent navigation within the site will no longer cause a full page reload. Instead, the incoming page's content will be fetched and dynamically updated. VitePress also automatically pre-fetches page chunks for links that are within viewport. In most cases, post-load navigation will feel instant.
* **Interactivity Without Penalty**
To be able to hydrate the dynamic Vue parts embedded inside static Markdown, each Markdown page is processed as a Vue component and compiled into JavaScript. This may sound inefficient, but the Vue compiler is smart enough to separate the static and dynamic parts, minimizing both the hydration cost and payload size. For the initial page load, the static parts are automatically eliminated from the JavaScript payload and skipped during hydration.
## What About VuePress?
VitePress is the spiritual successor of VuePress 1. The original VuePress 1 was based on Vue 2 and webpack. With Vue 3 and Vite under the hood, VitePress provides significantly better DX, better production performance, a more polished default theme, and a more flexible customization API.
The API difference between VitePress and VuePress 1 mostly lies in theming and customization. If you are using VuePress 1 with the default theme, it should be relatively straightforward to migrate to VitePress.
Maintaining two SSGs in parallel isn't sustainable, so the Vue team has decided to focus on VitePress as the main recommended SSG in the long run. Now VuePress 1 has been deprecated, and VuePress 2 has been handed over to the VuePress community team for further development and maintenance.
` element. If you want to add block elements, consider using [`layout-bottom`](../guide/extending-default-theme#layout-slots) slot instead.
:::
Note that footer will not be displayed when the [SideBar](./default-theme-sidebar) is visible.
## Frontmatter Config
This can be disabled per-page using the `footer` option on frontmatter:
```yaml
---
footer: false
---
```
---
---
url: /guide/frontmatter.md
---
# Frontmatter
## Usage
VitePress supports YAML frontmatter in all Markdown files, parsing them with [gray-matter](https://github.com/jonschlinkert/gray-matter). The frontmatter must be at the top of the Markdown file (before any elements including `
```
````
**Output**
```js
export default {
name: 'MyComponent'
// ...
}
```
```html
```
A [list of valid languages](https://shiki.style/languages) is available on Shiki's repository.
You may also customize syntax highlight theme, configure language aliases, and set custom language labels in app config. Please see [`markdown` options](../reference/site-config#markdown) for more details.
## Line Highlighting in Code Blocks
**Input**
````
```js{4}
export default {
data () {
return {
msg: 'Highlighted!'
}
}
}
```
````
**Output**
```js{4}
export default {
data () {
return {
msg: 'Highlighted!'
}
}
}
```
In addition to a single line, you can also specify multiple single lines, ranges, or both:
* Line ranges: for example `{5-8}`, `{3-10}`, `{10-17}`
* Multiple single lines: for example `{4,7,9}`
* Line ranges and single lines: for example `{4,7-13,16,23-27,40}`
**Input**
````
```js{1,4,6-8}
export default { // Highlighted
data () {
return {
msg: `Highlighted!
This line isn't highlighted,
but this and the next 2 are.`,
motd: 'VitePress is awesome',
lorem: 'ipsum'
}
}
}
```
````
**Output**
```js{1,4,6-8}
export default { // Highlighted
data () {
return {
msg: `Highlighted!
This line isn't highlighted,
but this and the next 2 are.`,
motd: 'VitePress is awesome',
lorem: 'ipsum',
}
}
}
```
Alternatively, it's possible to highlight directly in the line by using the `// [!code highlight]` comment.
**Input**
````
```js
export default {
data () {
return {
msg: 'Highlighted!' // [!!code highlight]
}
}
}
```
````
**Output**
```js
export default {
data() {
return {
msg: 'Highlighted!' // [!code highlight]
}
}
}
```
## Focus in Code Blocks
Adding the `// [!code focus]` comment on a line will focus it and blur the other parts of the code.
Additionally, you can define a number of lines to focus using `// [!code focus:
+ 
```
::: warning
For dynamic images you still need `withBase` as shown in [Base URL guide](./asset-handling#base-url).
:::
Use `
{{ theme.footer.copyright }}
```
## `useRoute`
Returns the current route object with the following type:
```ts
interface Route {
path: string
data: PageData
component: Component | null
}
```
## `useRouter`
Returns the VitePress router instance so you can programmatically navigate to another page.
```ts
interface Router {
/**
* Current route.
*/
route: Route
/**
* Navigate to a new URL.
*/
go: (to?: string) => PromiseCustom Layout!
` header, combined with the global `title` as the suffix. For example with the following config and page content:
```ts
export default {
title: 'My Awesome Site'
}
```
```md
# Hello
```
The title of the page will be `Hello | My Awesome Site`.
### titleTemplate
* Type: `string | boolean`
* Can be overridden per page via [frontmatter](./frontmatter-config#titletemplate)
Allows customizing each page's title suffix or the entire title. For example:
```ts
export default {
title: 'My Awesome Site',
titleTemplate: 'Custom Suffix'
}
```
```md
# Hello
```
The title of the page will be `Hello | Custom Suffix`.
To completely customize how the title should be rendered, you can use the `:title` symbol in `titleTemplate`:
```ts
export default {
titleTemplate: ':title - Custom Suffix'
}
```
Here `:title` will be replaced with the text inferred from the page's first `
` header. The title of the previous example page will be `Hello - Custom Suffix`.
The option can be set to `false` to disable title suffixes.
### description
* Type: `string`
* Default: `A VitePress site`
* Can be overridden per page via [frontmatter](./frontmatter-config#description)
Description for the site. This will render as a `` tag in the page HTML.
```ts
export default {
description: 'A VitePress site'
}
```
### head
* Type: `HeadConfig[]`
* Default: `[]`
* Can be appended per page via [frontmatter](./frontmatter-config#head)
Additional elements to render in the `` tag in the page HTML. The user-added tags are rendered before the closing `head` tag, after VitePress tags.
```ts
type HeadConfig =
| [string, Record
` heading. Use `#title` and `#lead` slot to document about your team.
`
Custom Layout!
Custom Layout!
Custom Layout!
Custom Layout!